Android
4 Ways to Fix Wi-Fi Connected But No Internet on Android
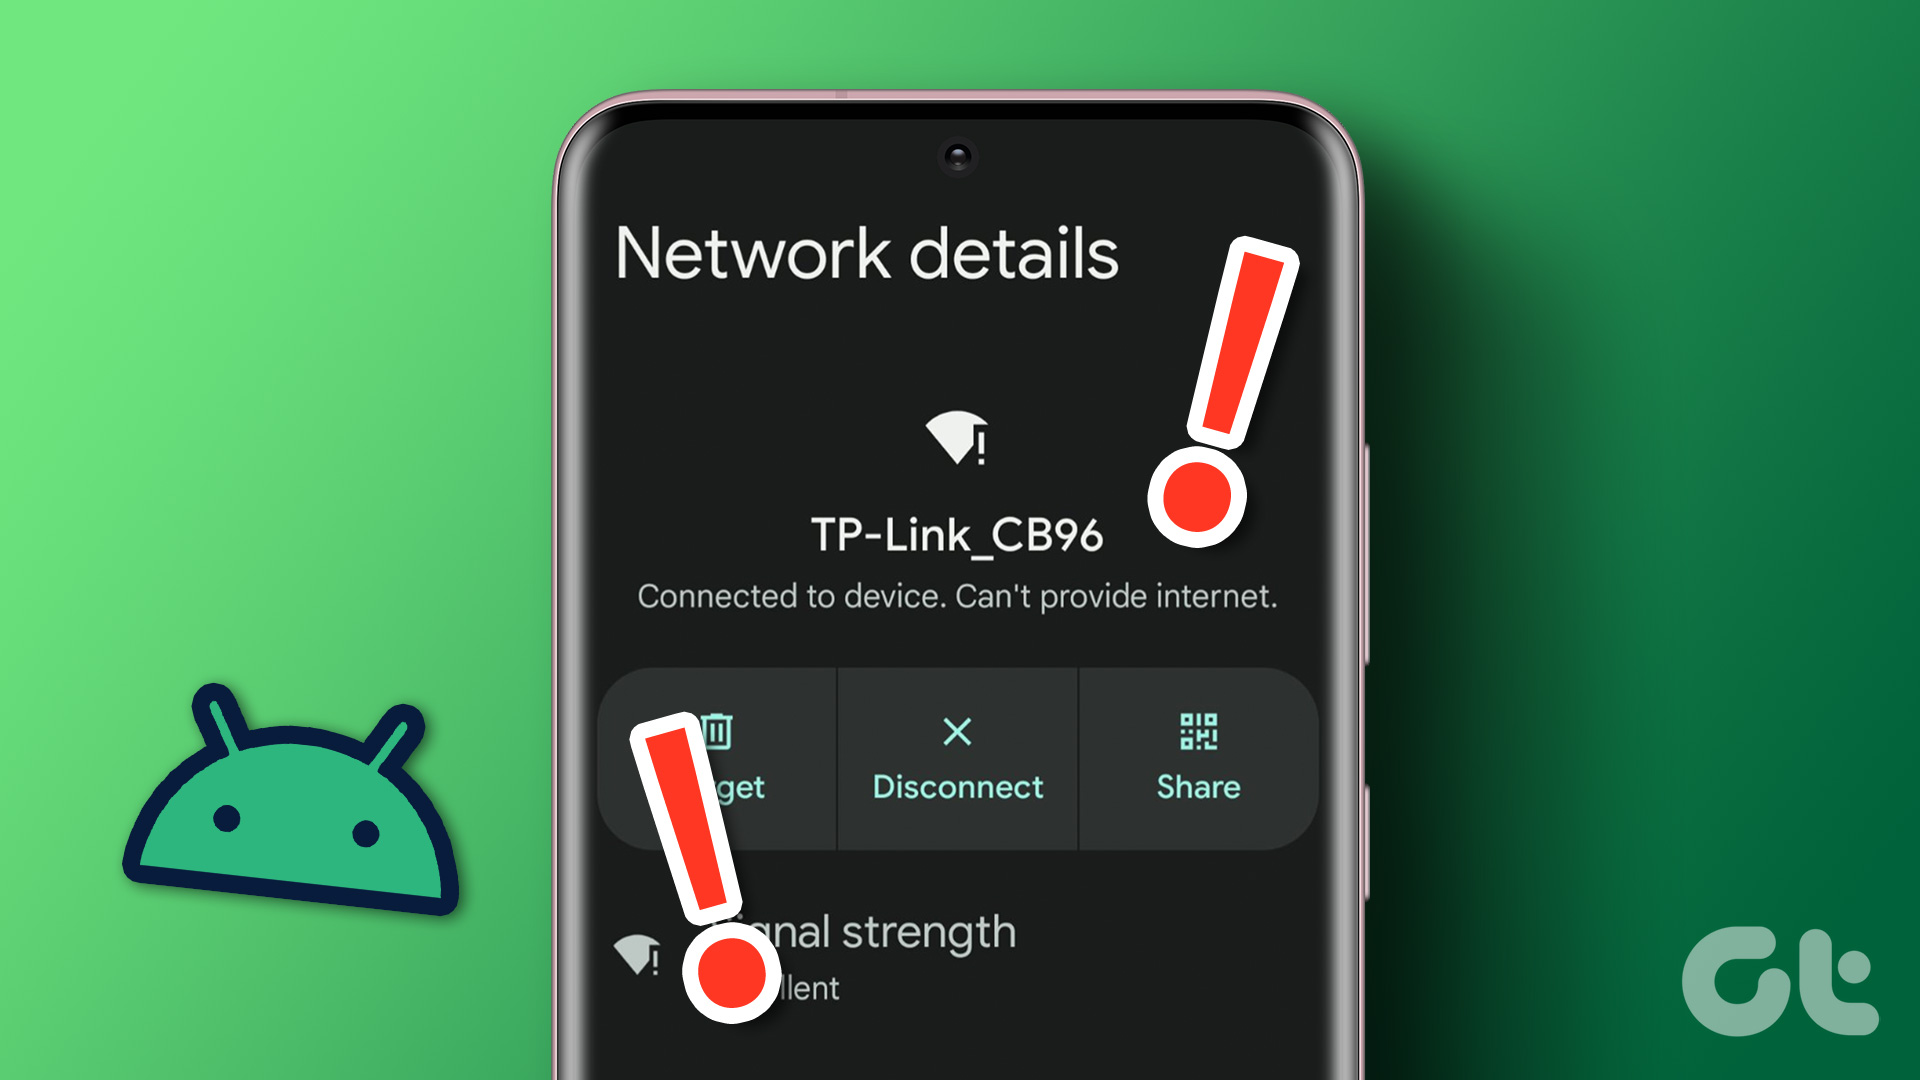
It's frustrating when your Android does not have internet access despite being connected to a Wi-Fi network. Here are some troubleshooting tips that can help you fix the underlying issue.
By Pankil Shah
Quick Tips
If you are using a public Wi-Fi network, you may need to sign in before you can use the internet on your Android device.
Ensure the Wi-Fi network isn’t set as a metered connection and is functioning correctly on other devices.
If the issue persists, consider changing the DNS server on your phone or resetting all network settings.
Try Basic Fixes
Sign in to the network: Although most public Wi-Fi networks are free to use, some require you to sign in with your email address or phone number and accept certain terms and conditions. If you’ve connected to such a network, your Android will display a notification asking you to sign in. Tap on that notification and follow the on-screen prompts to sign into your network.
Test the Wi-Fi network on another device: Another thing you can do is try using the same Wi-Fi network on another device. If the internet does not work on any device, check if your internet plan has expired or if you’ve reached your monthly quota.
Reconnect to the Wi-Fi network: This is a classic troubleshooting tip that almost always works. Disconnecting your phone from the Wi-Fi network and rejoining it will fix any issues caused by minor glitches or misconfigured settings.
Fix 1: Treat the Wi-Fi Network as Unmetered
If you have set the Wi-Fi network as metered , it can cause downloads and background internet activities to stop working on your Android. To avoid this, set your Wi-Fi network as an unmetered connection using these steps:
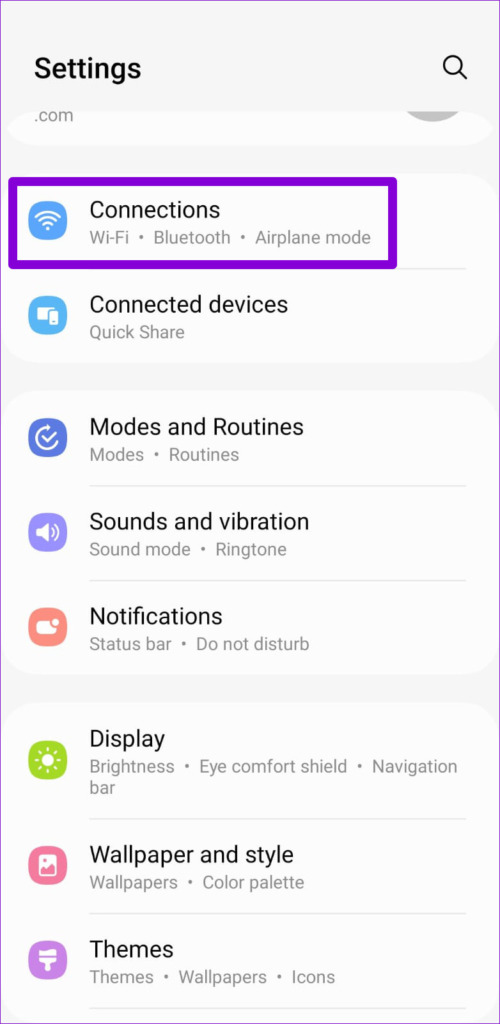
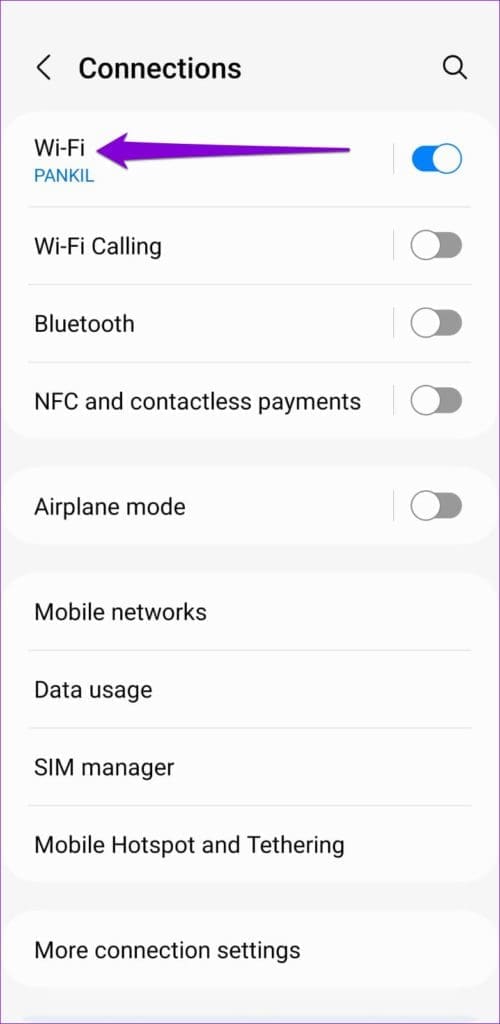
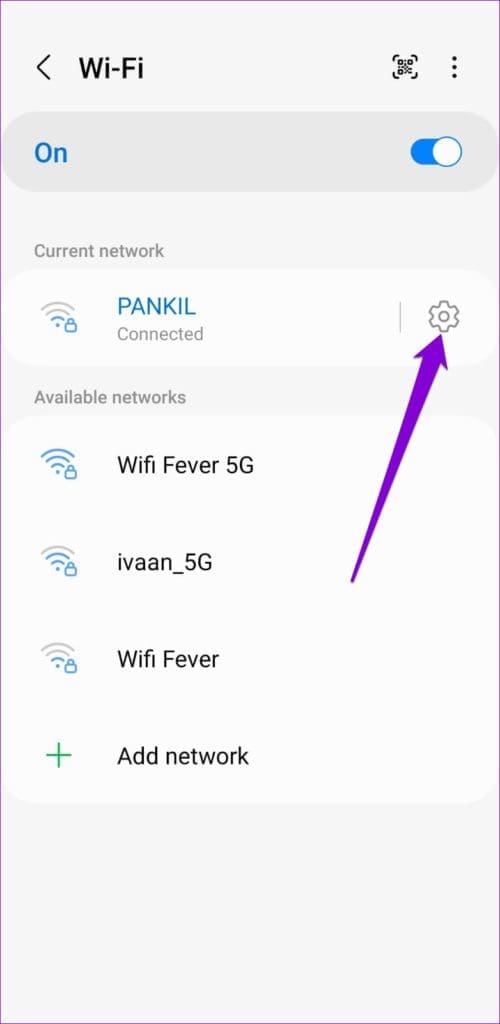
Step 1: Open the Settings app and navigate to Connections > Wi-Fi .
Step 2: Tap the gear icon next to your Wi-Fi network.
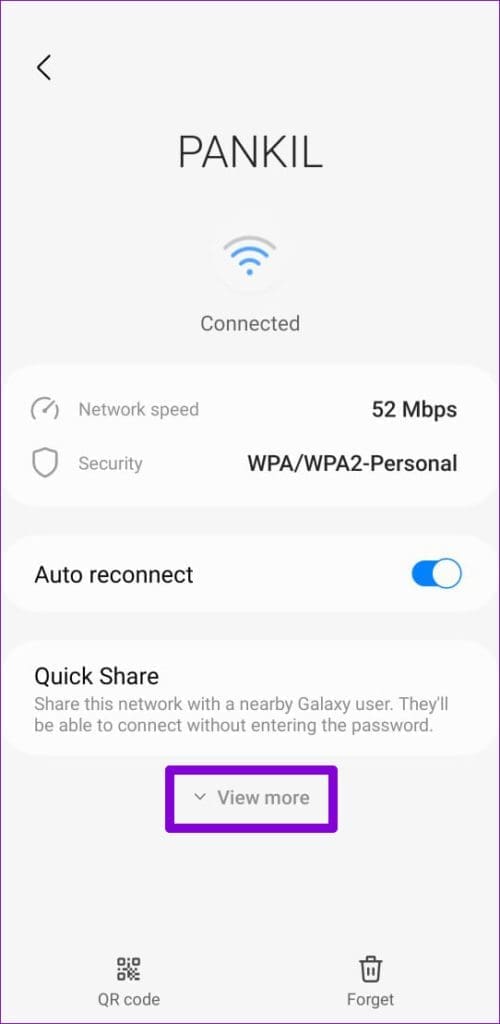
Step 3: Tap the View more option.
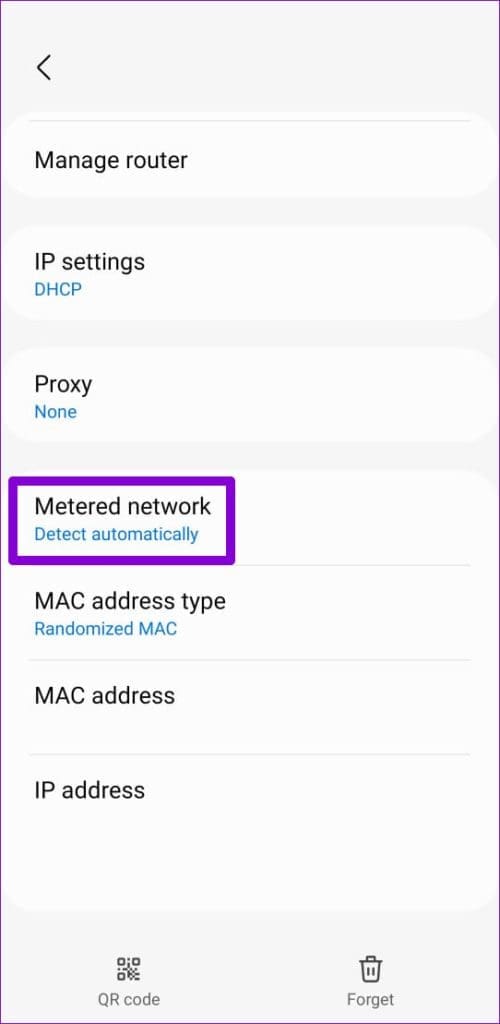
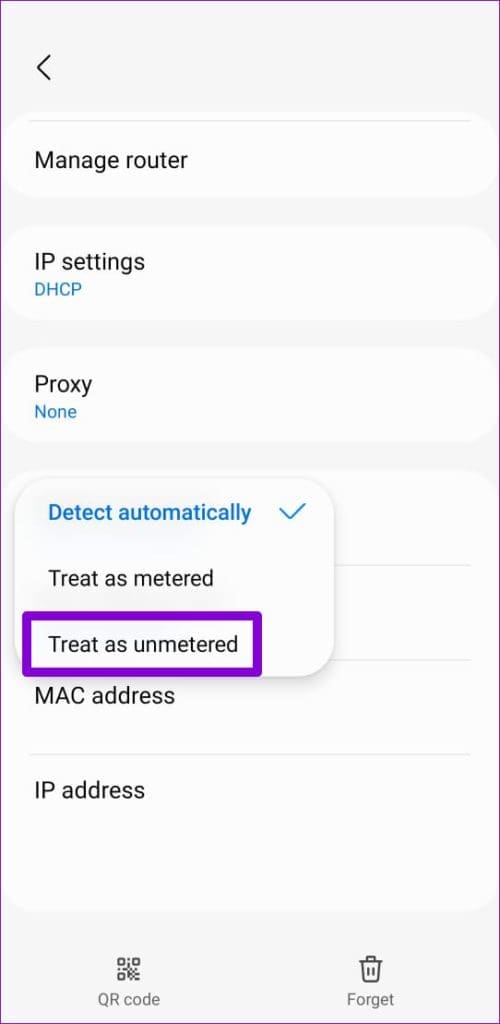
Step 4: Tap on Metered network and select Treat as unmetered .
Fix 2: Correct the Date and Time on Your Phone
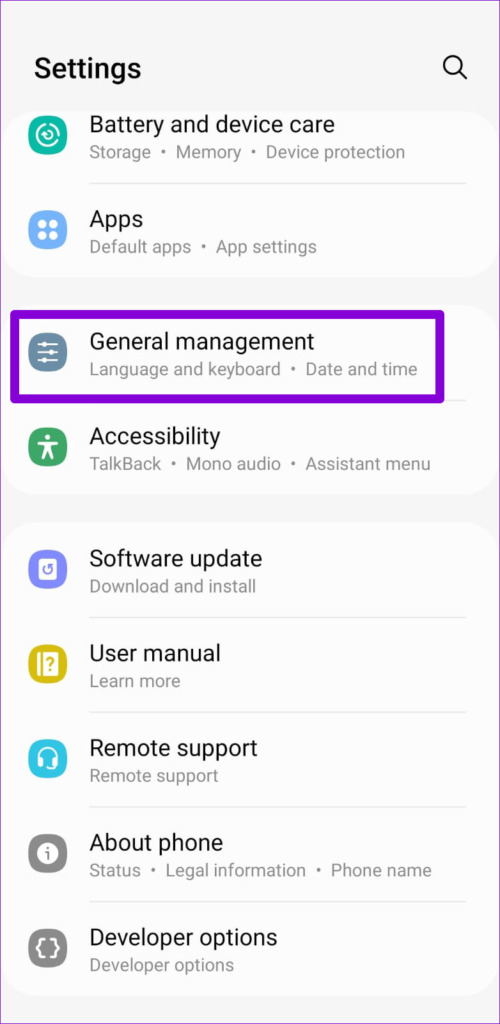
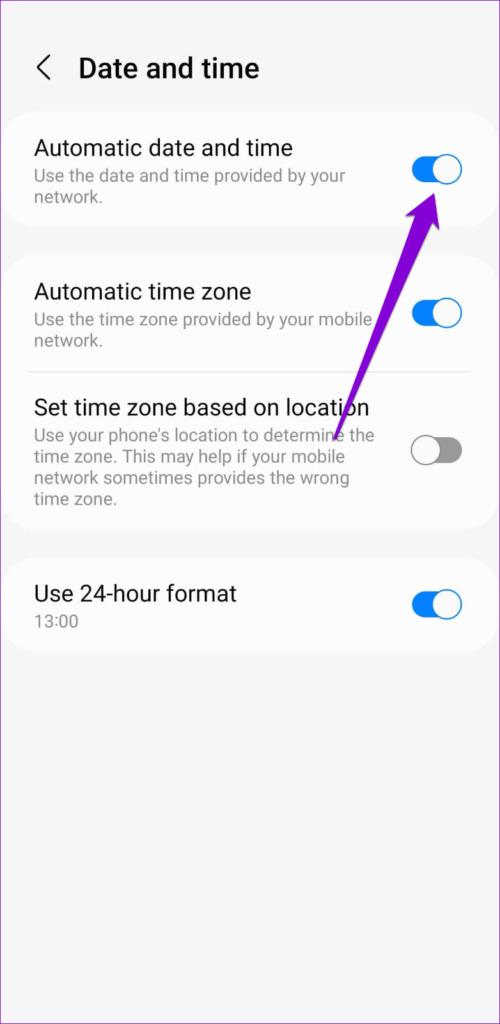
An incorrect date or time can also prevent Android and its apps from connecting to the internet. You can avoid such problems easily by configuring your phone to use the network-provided date and time.
Step 1: Open the Settings app and head over to General management .
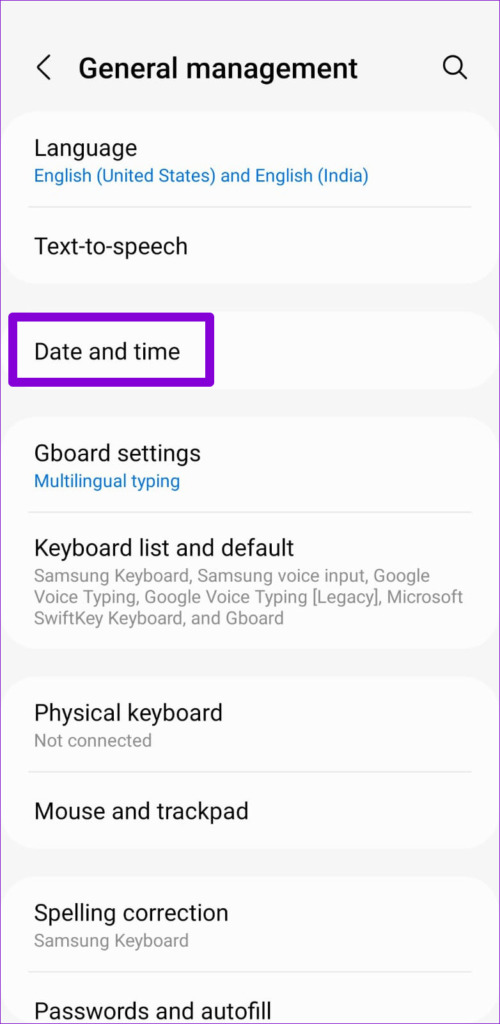
Step 2: Tap on Date and time and enable the toggle for Automatic date and time from the following screen.
Fix 3: Use Another DNS Server
Problems with the default DNS server on your Android can also cause the internet to stop working. Try switching to a different DNS server to see if that improves the situation.
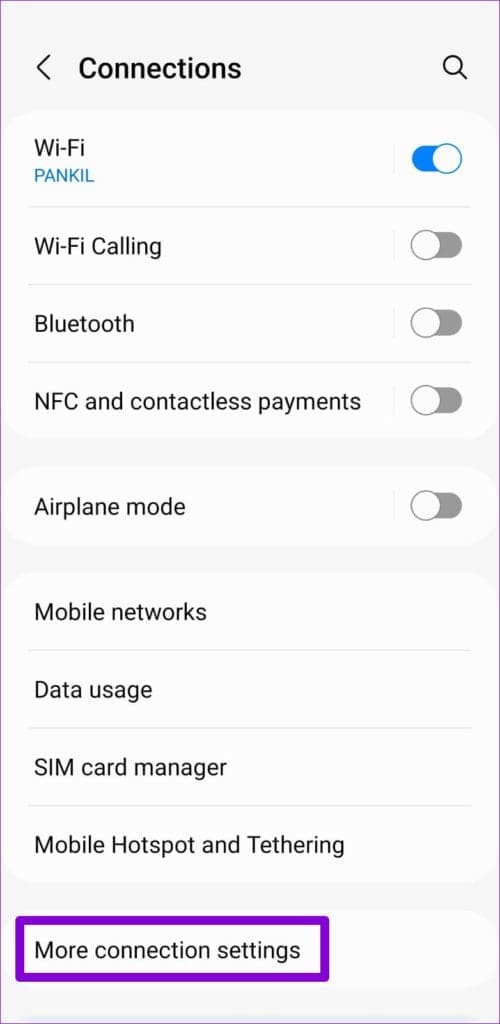
Step 1: Open the Settings app on your phone and navigate to Connections .
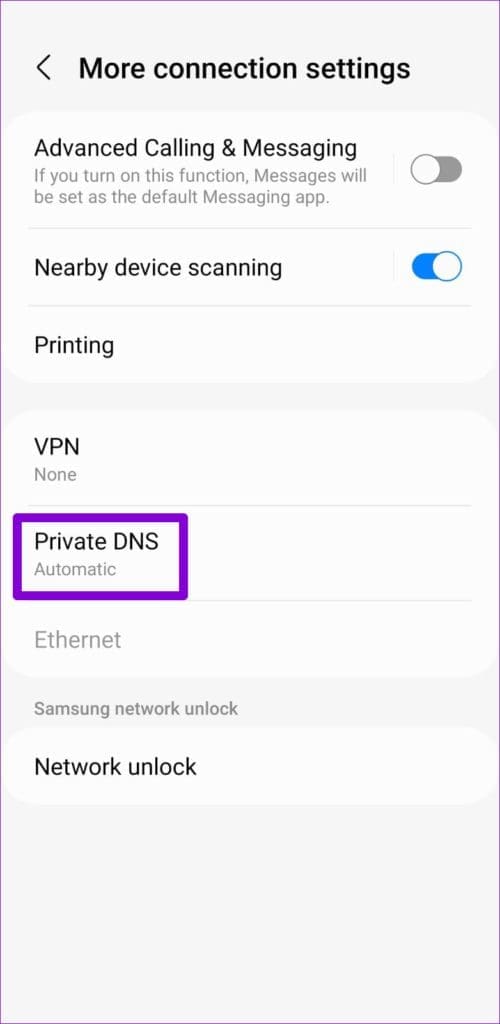
Step 2: Tap on More connection settings and select Private DNS from the following menu.
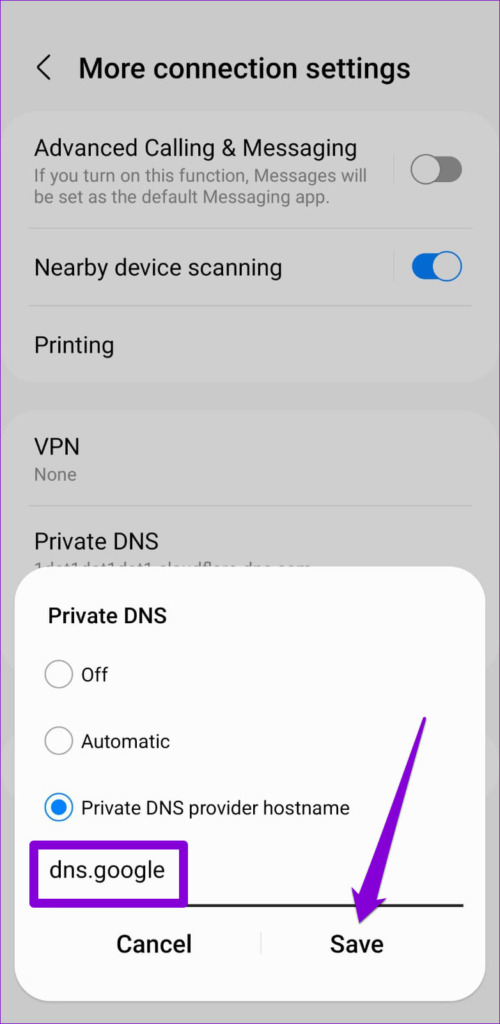
Step 3: Select Private DNS provider hostname and type in a TLS hostname in the box. If you wish to use Google’s public DNS servers, for instance, type dns.google in the text field if you see the option for providing DNS provider hostname.
Step 4: Tap Save .
Fix 4: Reset Network Settings
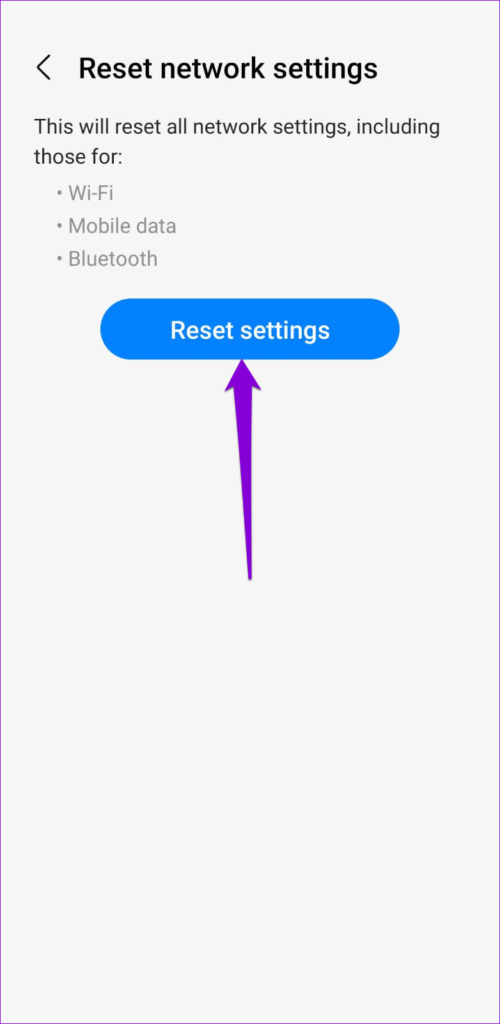
If you still can’t connect to the internet, you can reset the network settings on your Android . This will revert all the network settings to their default values and fix any problems.
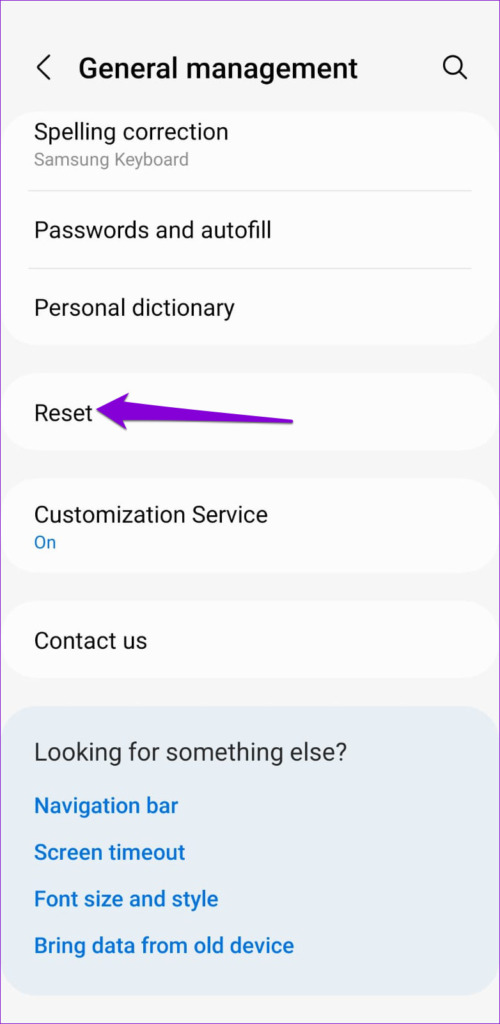
Step 1: Open the Settings app and go to General management > Reset .
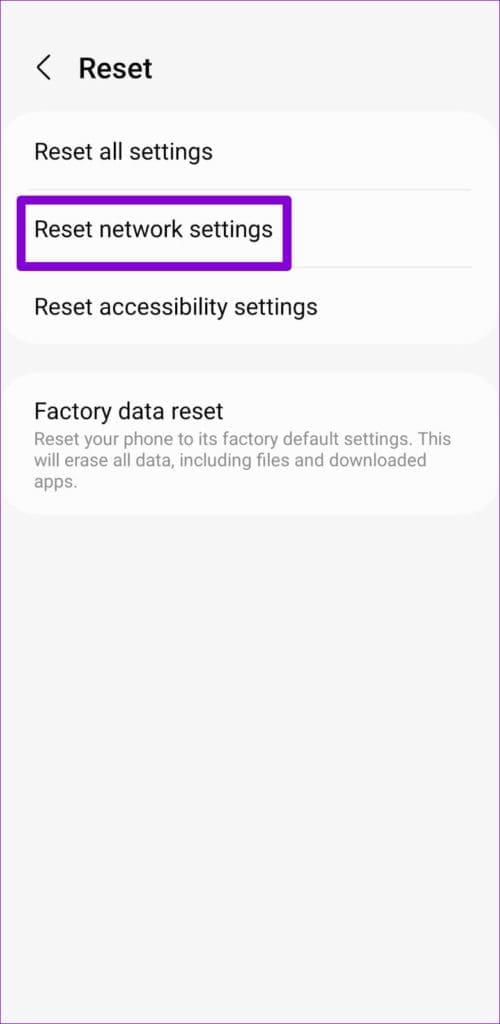
Step 2: Tap Reset network settings and hit the Reset settings button to confirm.
Was this helpful?
Submit Cancel
Thanks for your feedback!
Keep reading