Android
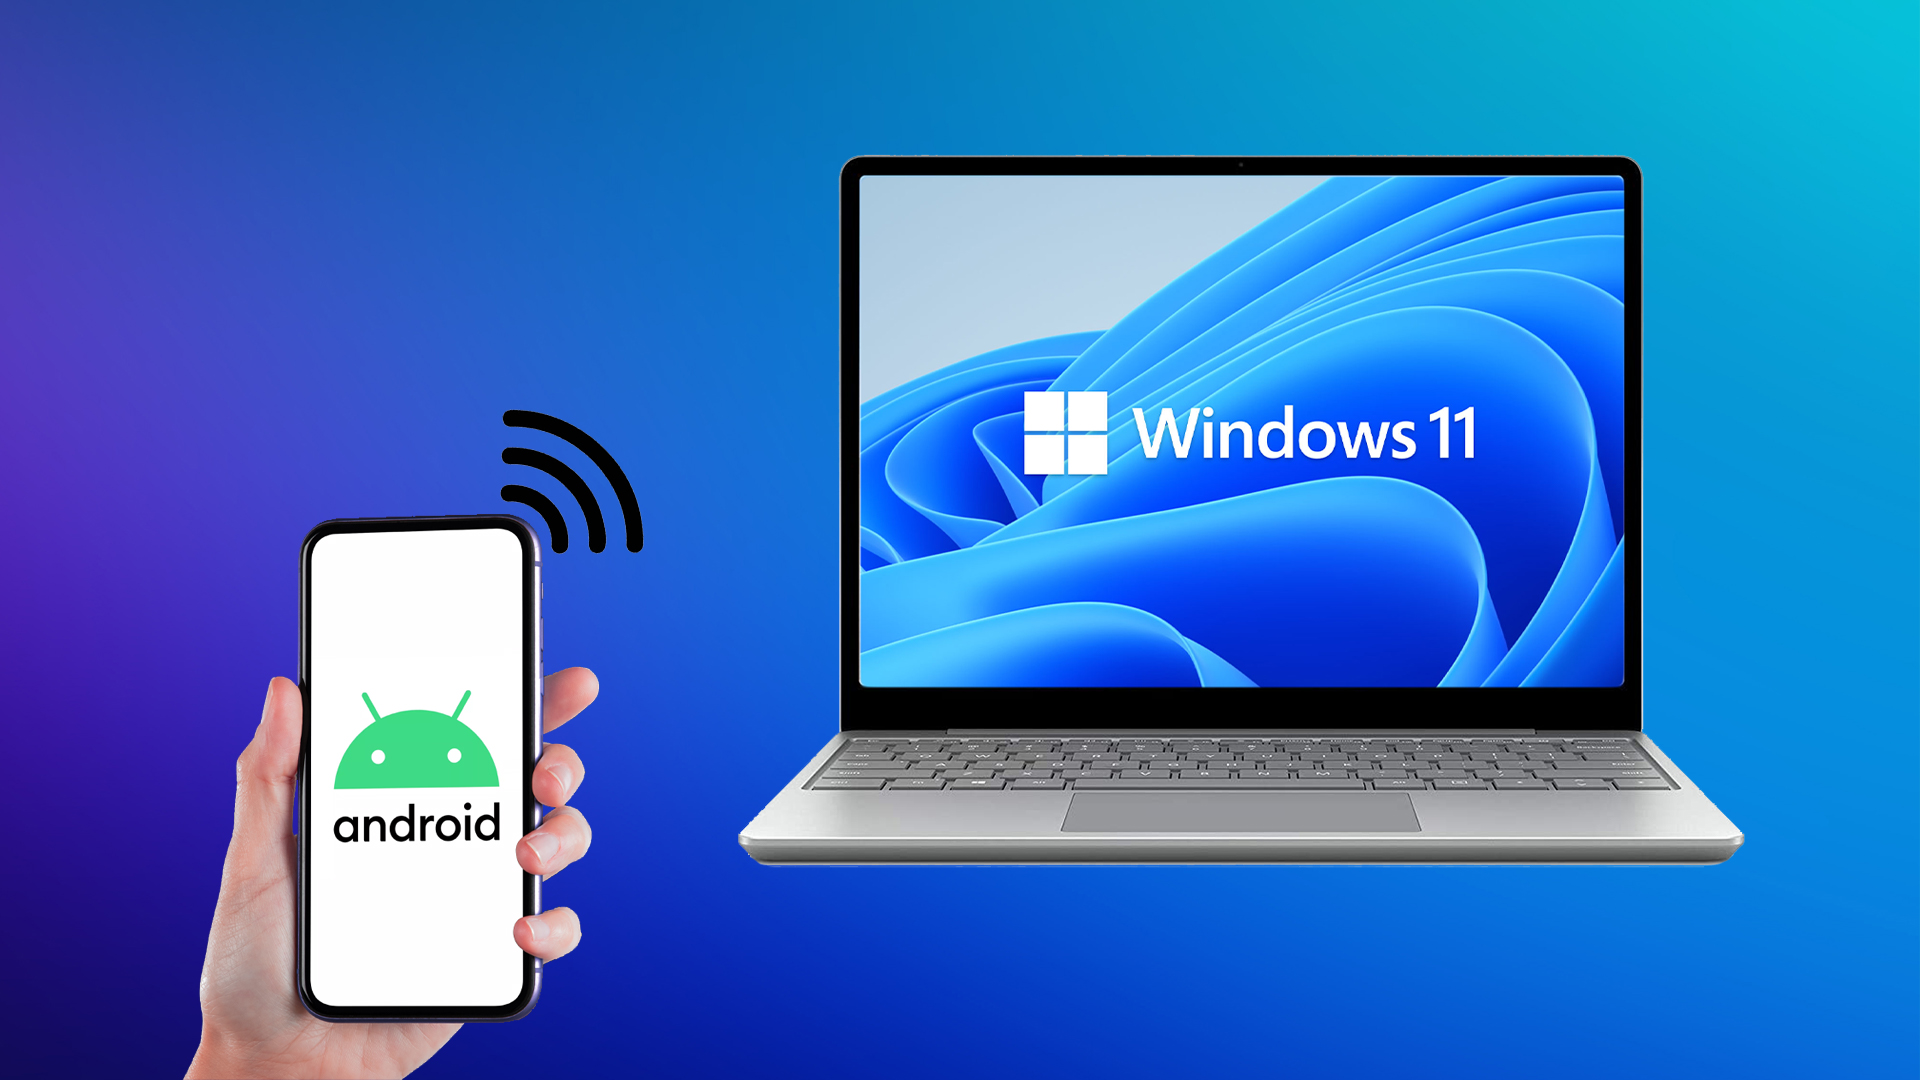
How to Mirror Android to Your Windows 11 PC
Want to display Android's screen to many? Here's how to set up and mirror Android phone's screen on a Windows 11 PC.
By Ayush Patel
Quick Tips
Enable Wireless Display : Go to Settings > Apps > Optional Features on your PC, and install the Wireless Display feature.
Configure Windows : Set up your PC for projection under Projecting to this PC in Settings.
Prepare Android Device : Access the Cast feature in your phone’s settings and connect to your PC.
Installing and Enabling the Wireless Display Feature
Step 1: Use the Windows + I shortcut to open the Settings app.
Step 2: Inside the Settings app, click on the Apps and click on Optional features .
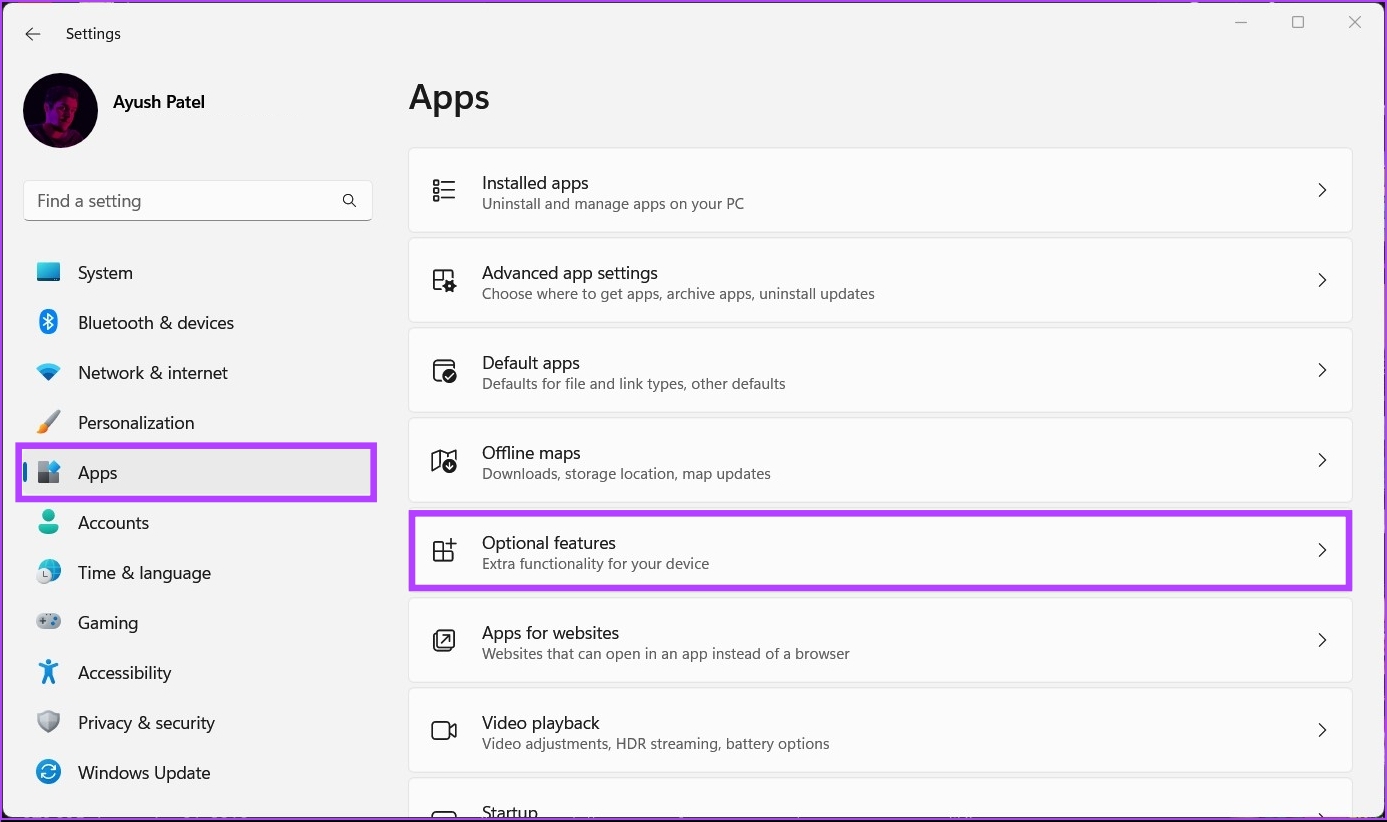
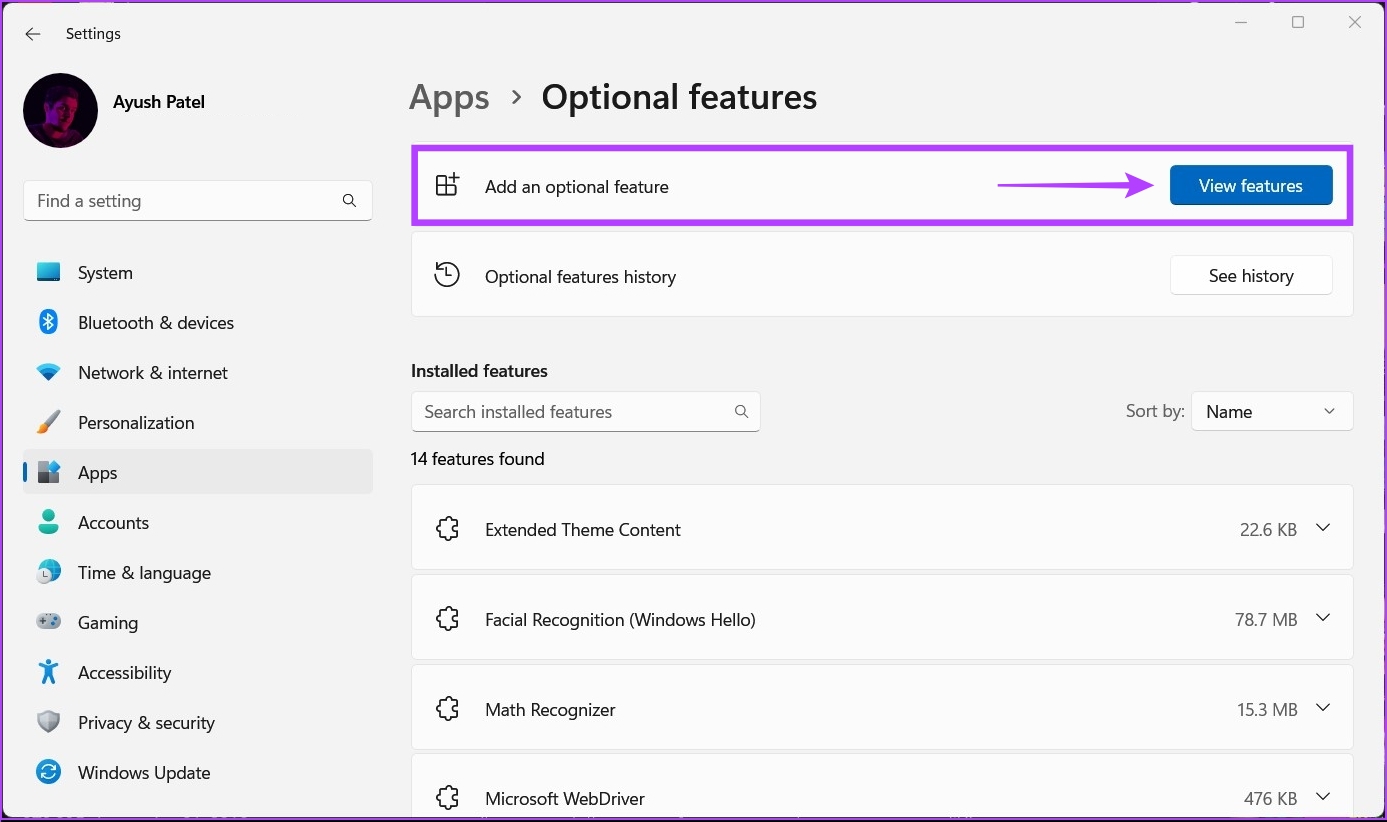
Step 3: Click on the View features next to Add an optional feature section.
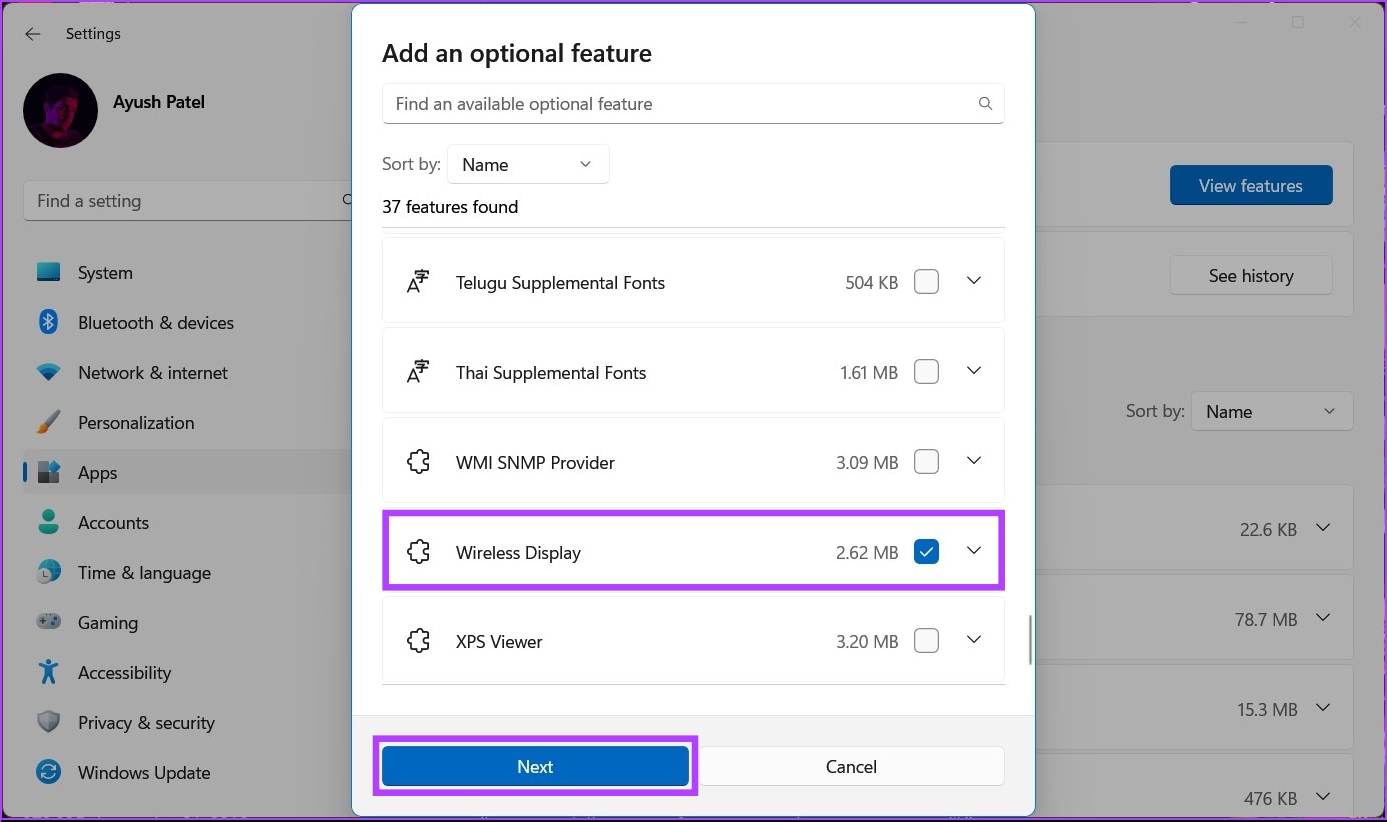
Step 4: Check the box next to Wireless Display and click the Next button.
Step 5: On the following screen , click the Install button.
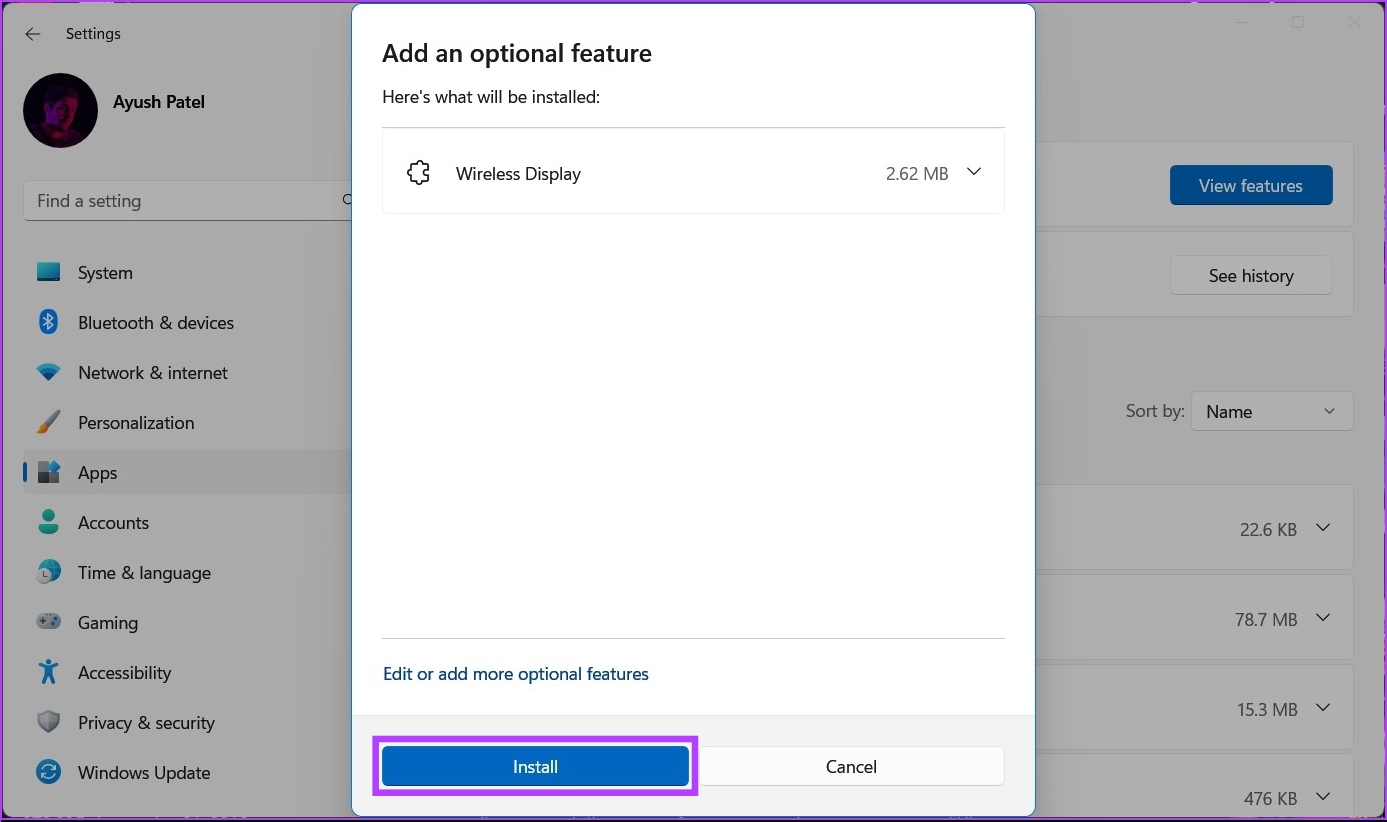
After that, Windows 11 will automatically download and install the necessary files to enable the Wireless Display feature on your computer.
After installing and enabling Wireless Display on your Windows 11, you may set up screen mirroring from your Android phone.
Also Read : Fixes when Wireless Display feature is not working on Windows 11
Mirroring Android Devices to Windows 11
To mirror an Android smartphone to your PC, you must ensure that both devices are appropriately configured and connected to the same Wi-Fi network.
Configuring Your Windows 11 PC
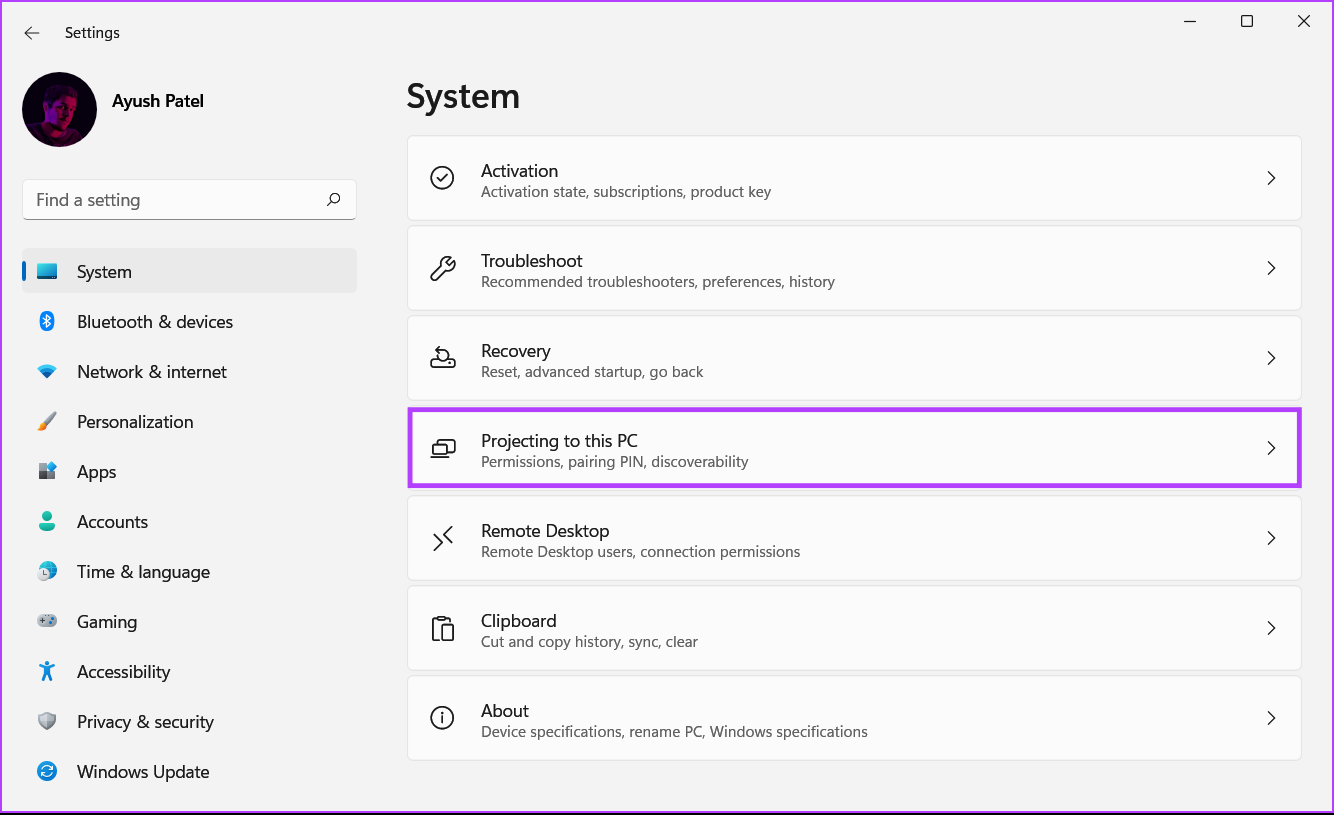
Step 1: Open the Windows Settings app. Then, scroll down and click on Projecting to this PC .
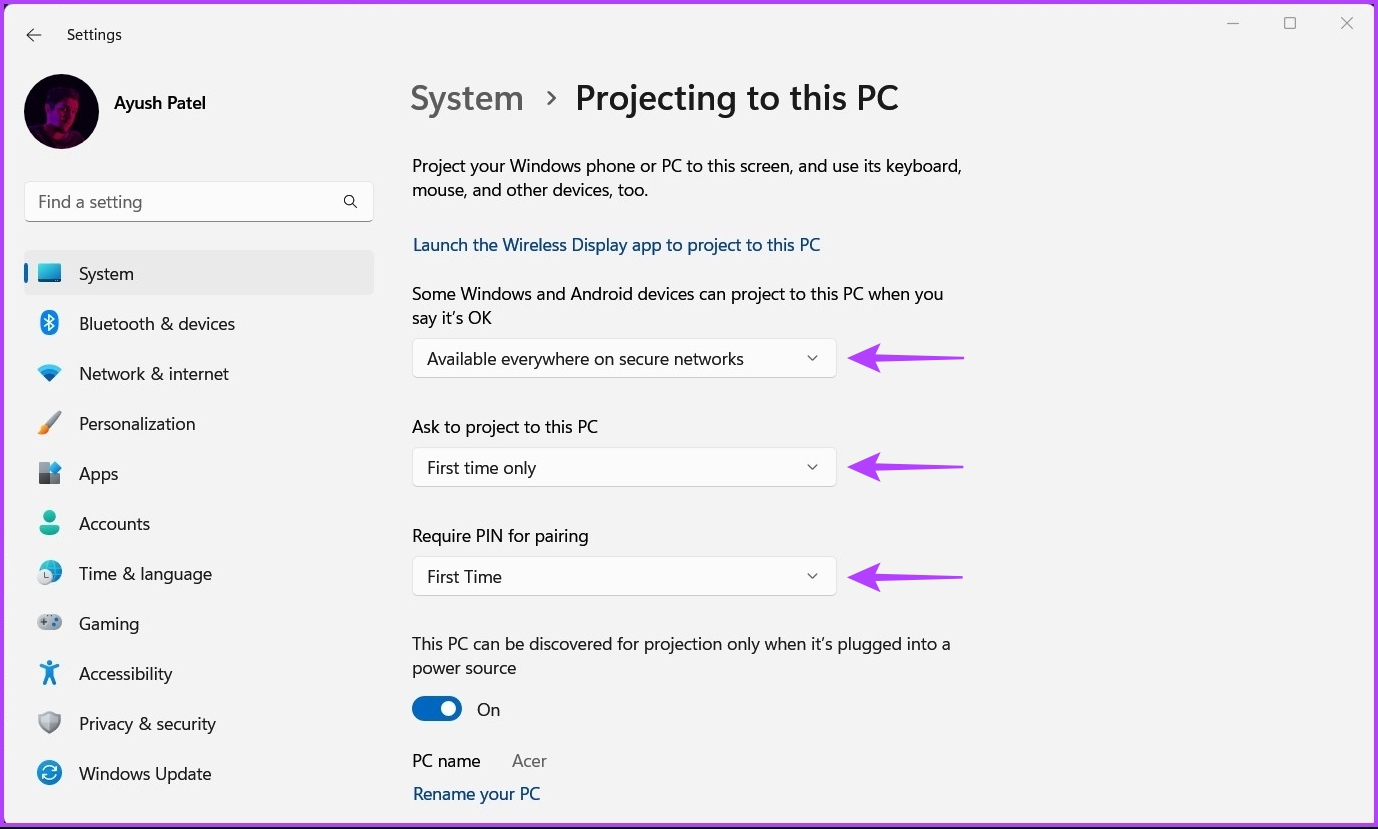
Step 2: Now, click on one drop-down at a time and ensure that you select all the options that are selected in the screenshot below:
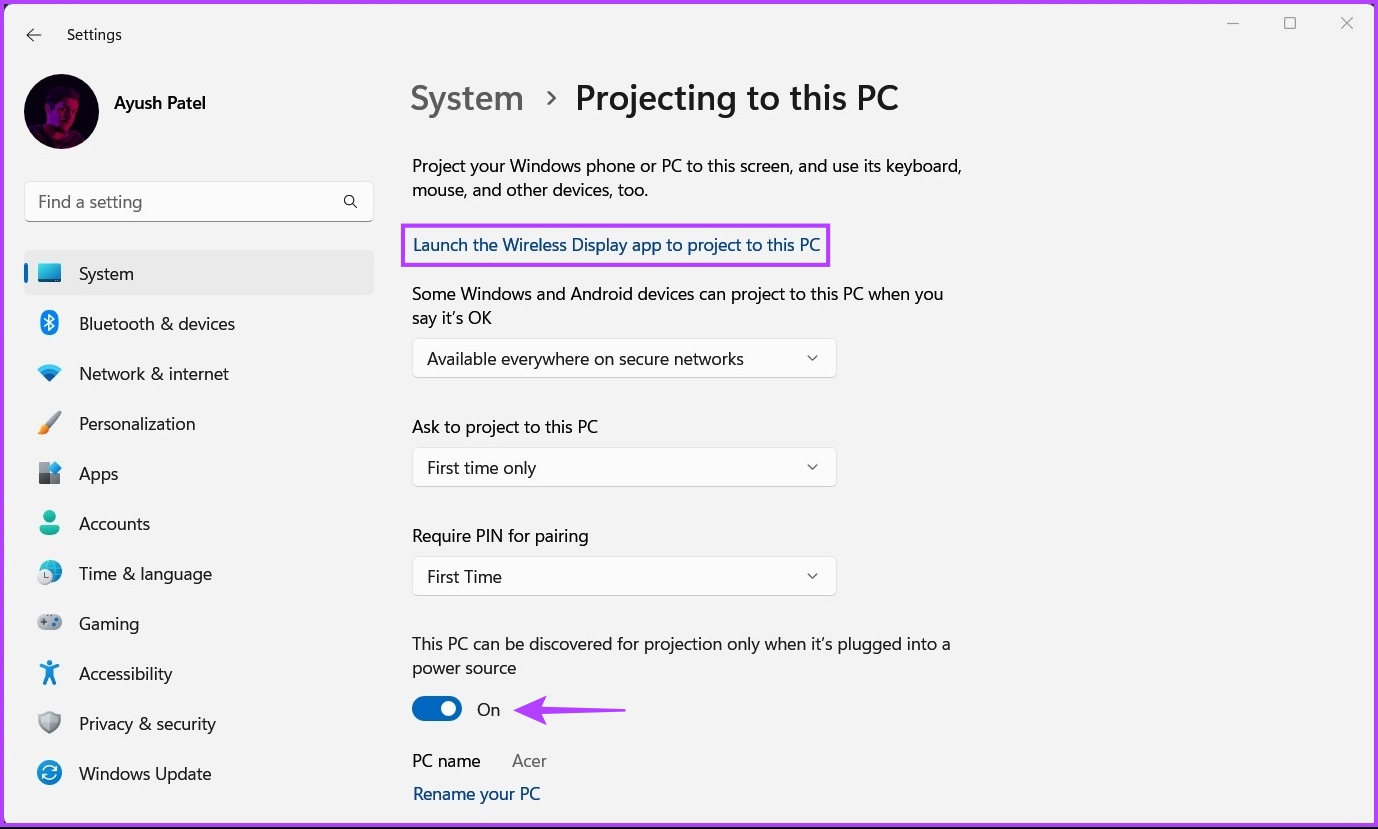
Step 3: Click on the Launch the Wireless Display app to project to this PC option.
Note : If you’re trying to use the Wireless Display feature on a laptop, you must turn off the This PC can be discovered for projection only when it’s plugged into a power source toggle.
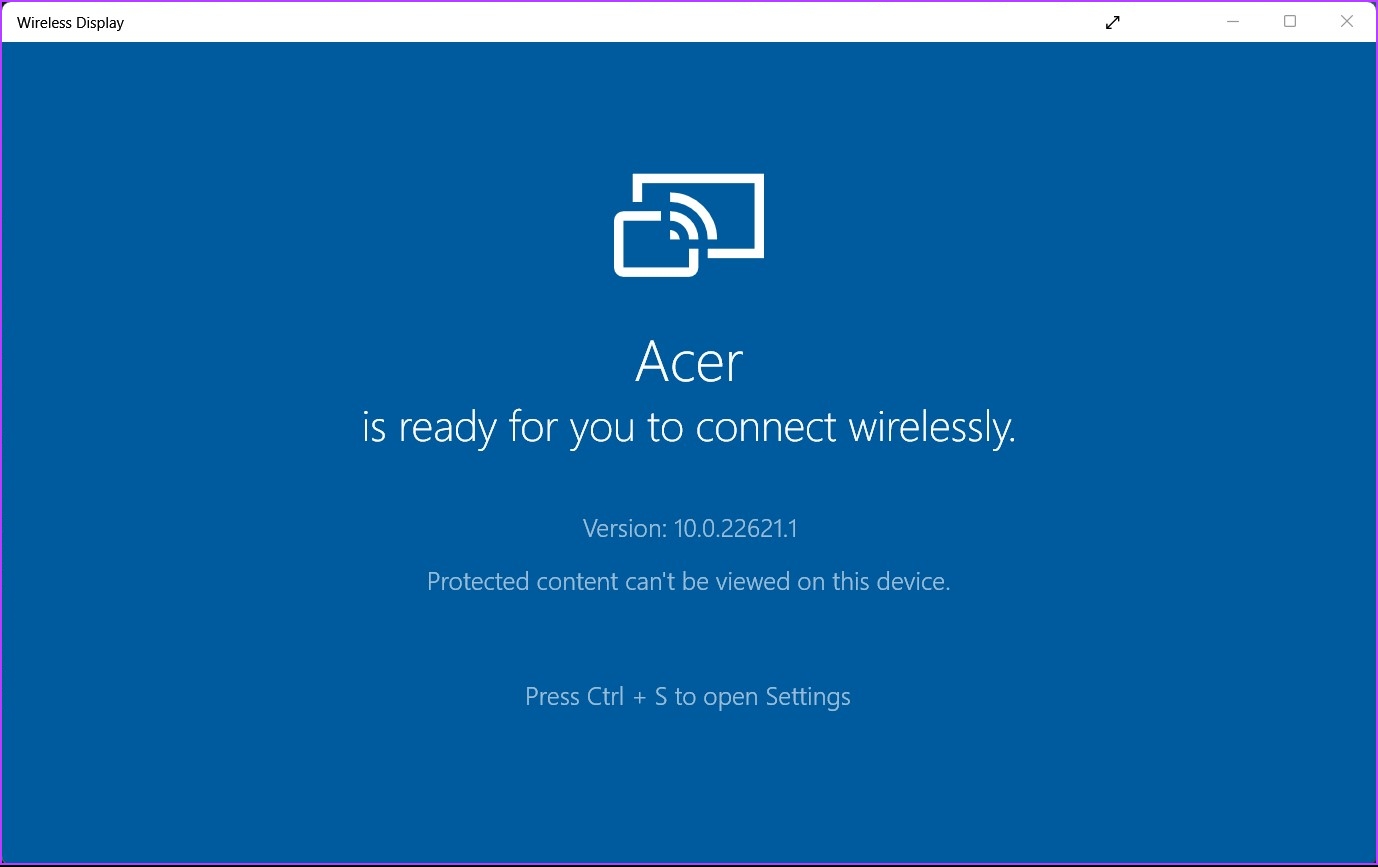
After that, you’ll see a blue Wireless Display window on your screen with the message, Your PC’s Name is ready for you to connect wirelessly.
After you’ve configured and confirmed that Wireless Display works on your Windows 11 PC, let’s move to the Android phone to get things ready.
Configuring Your Android Device
Almost all Android phones have a Cast feature built inside, regardless of the phone maker. So, it is pretty easy to configure your Android device for screen mirroring.
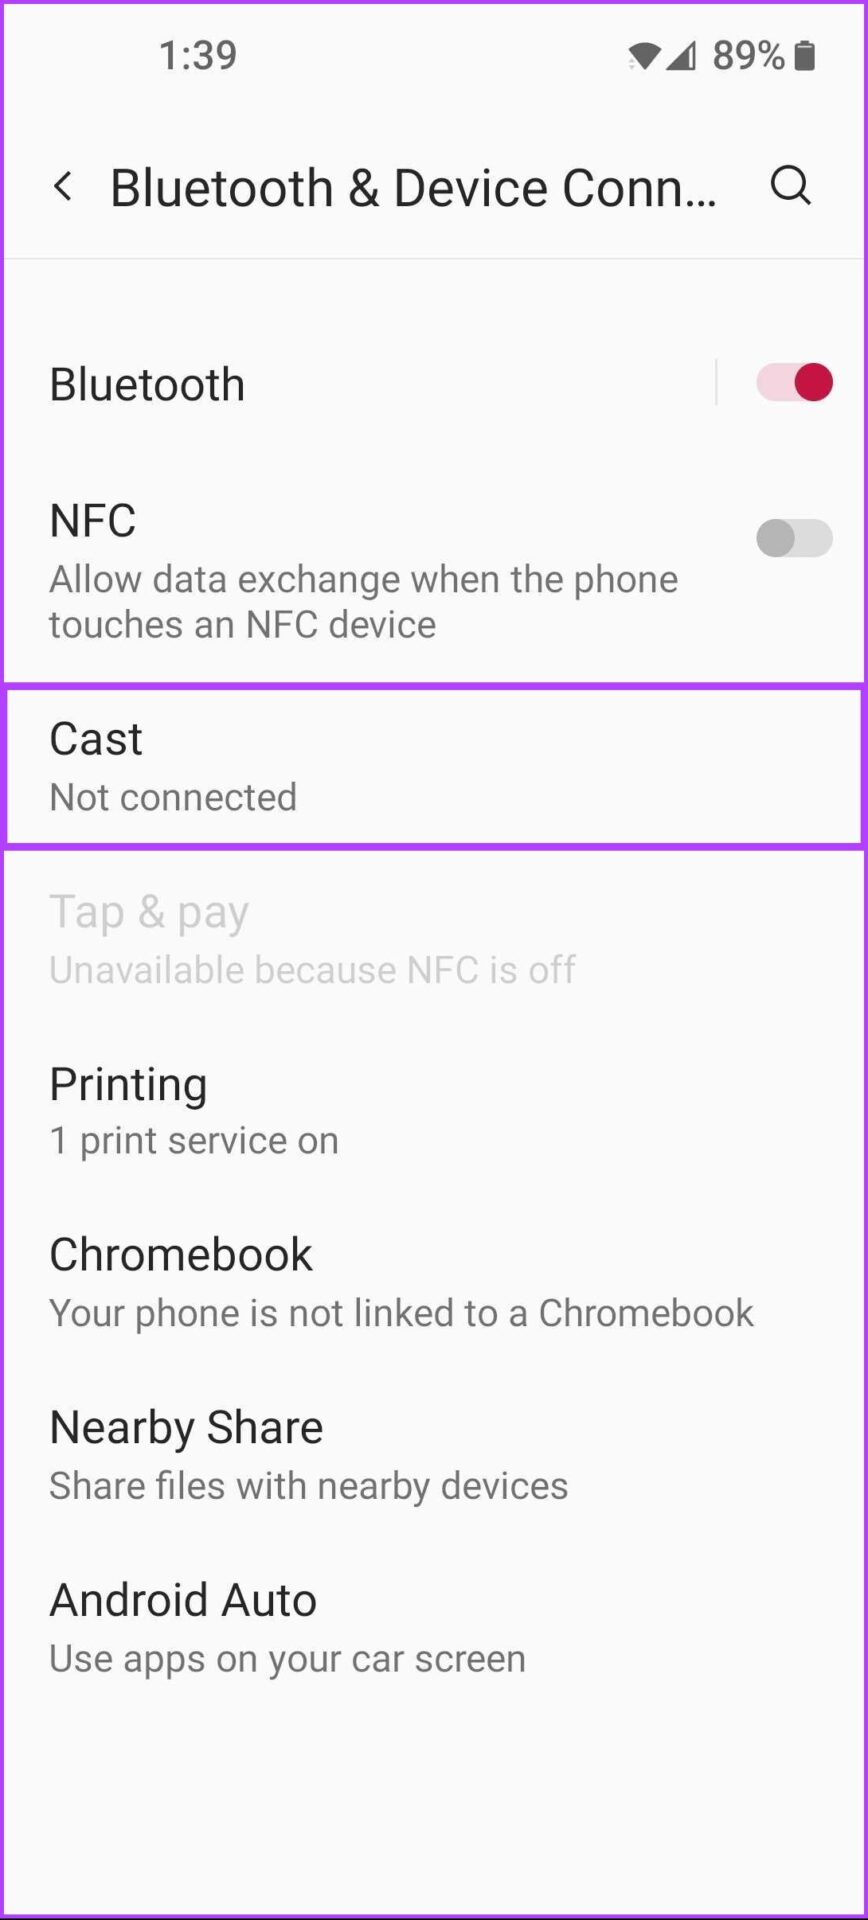
Step 1: Open the Settings app on your Android device. Then, tap on Bluetooth & Device Connection .
Note: The Settings app may look different on your Android phone depending on its make and Android version.
Step 3: Under Bluetooth & Device Connection, tap the Cast option.
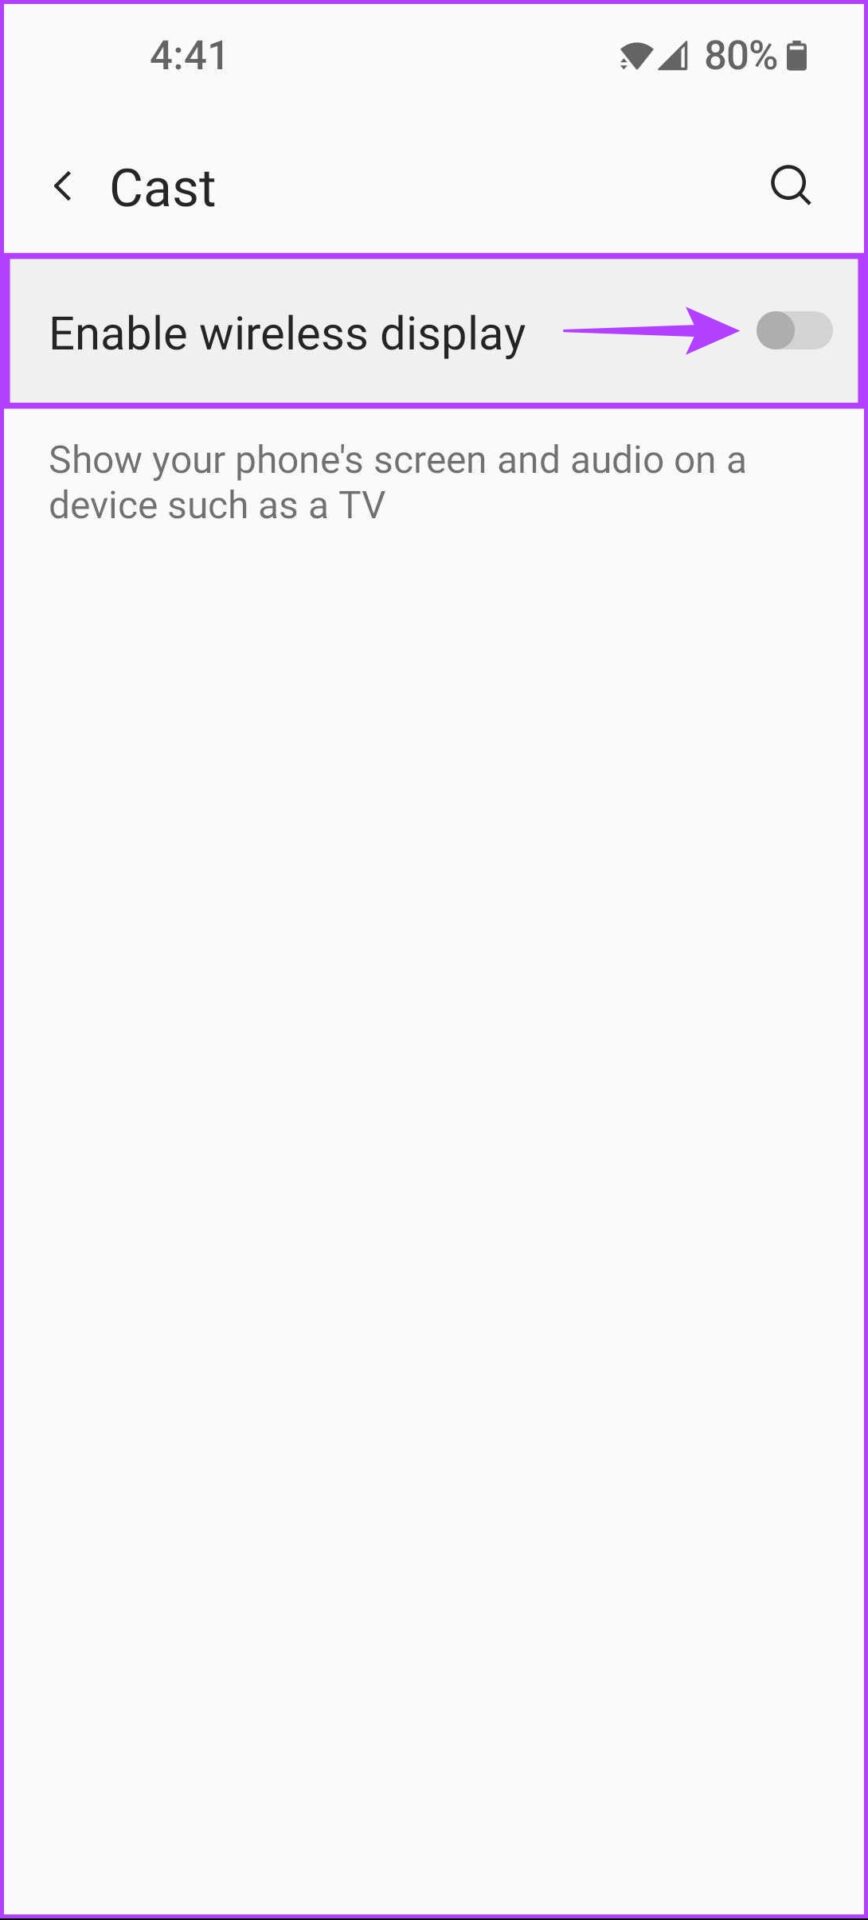
Step 4: Under Cast, tap on the Enable wireless display toggle to turn it on.
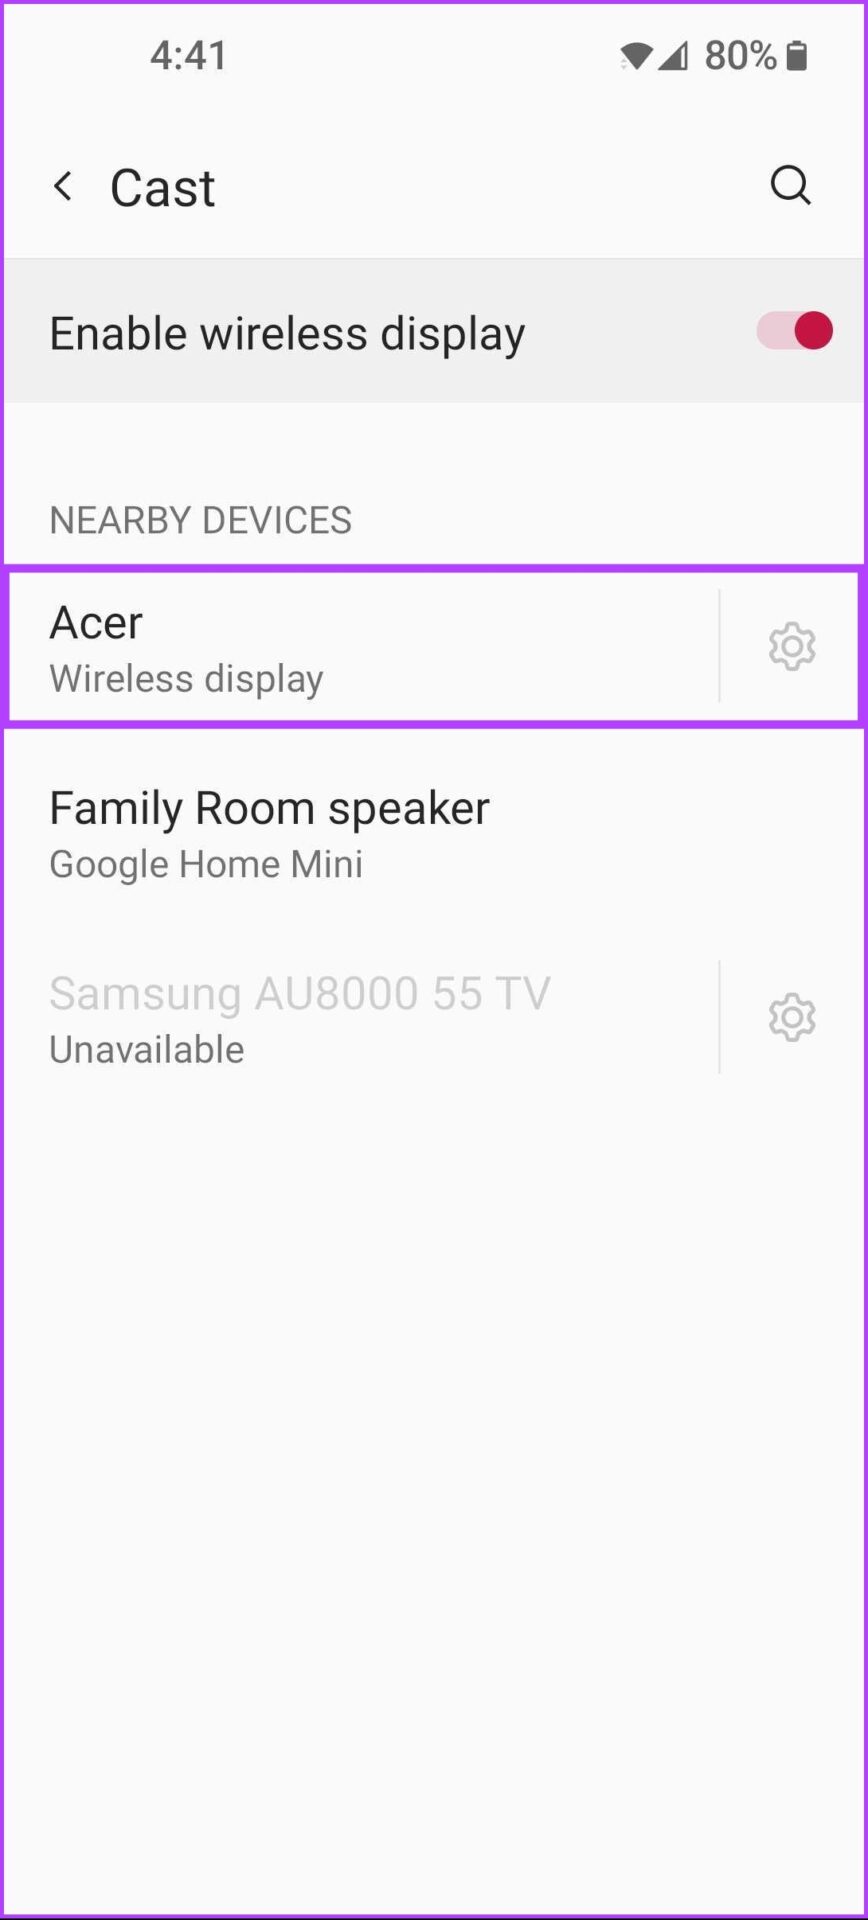
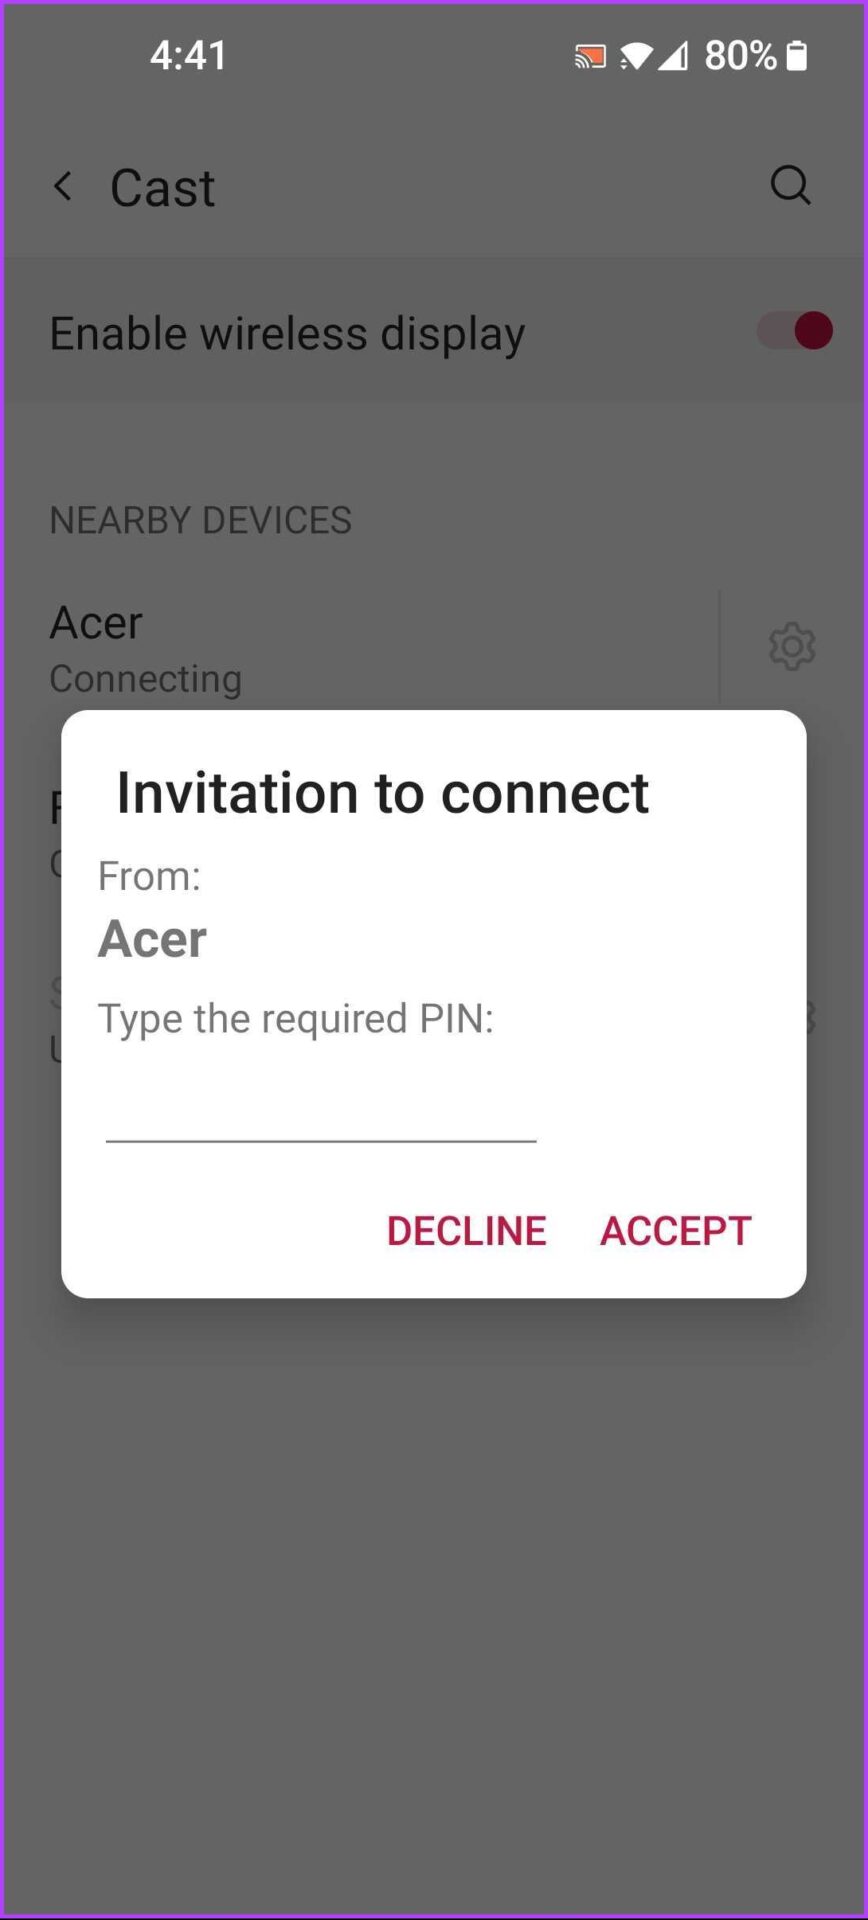
Step 5: Now, tap on your PC’s name. This will open an Invitation to connect dialog, and you’ll need to enter the 8-digit PIN that you can find on your Windows 11 PC.
Your Windows 11 PC will display an 8-digit security PIN, which you’ll need for the next step.
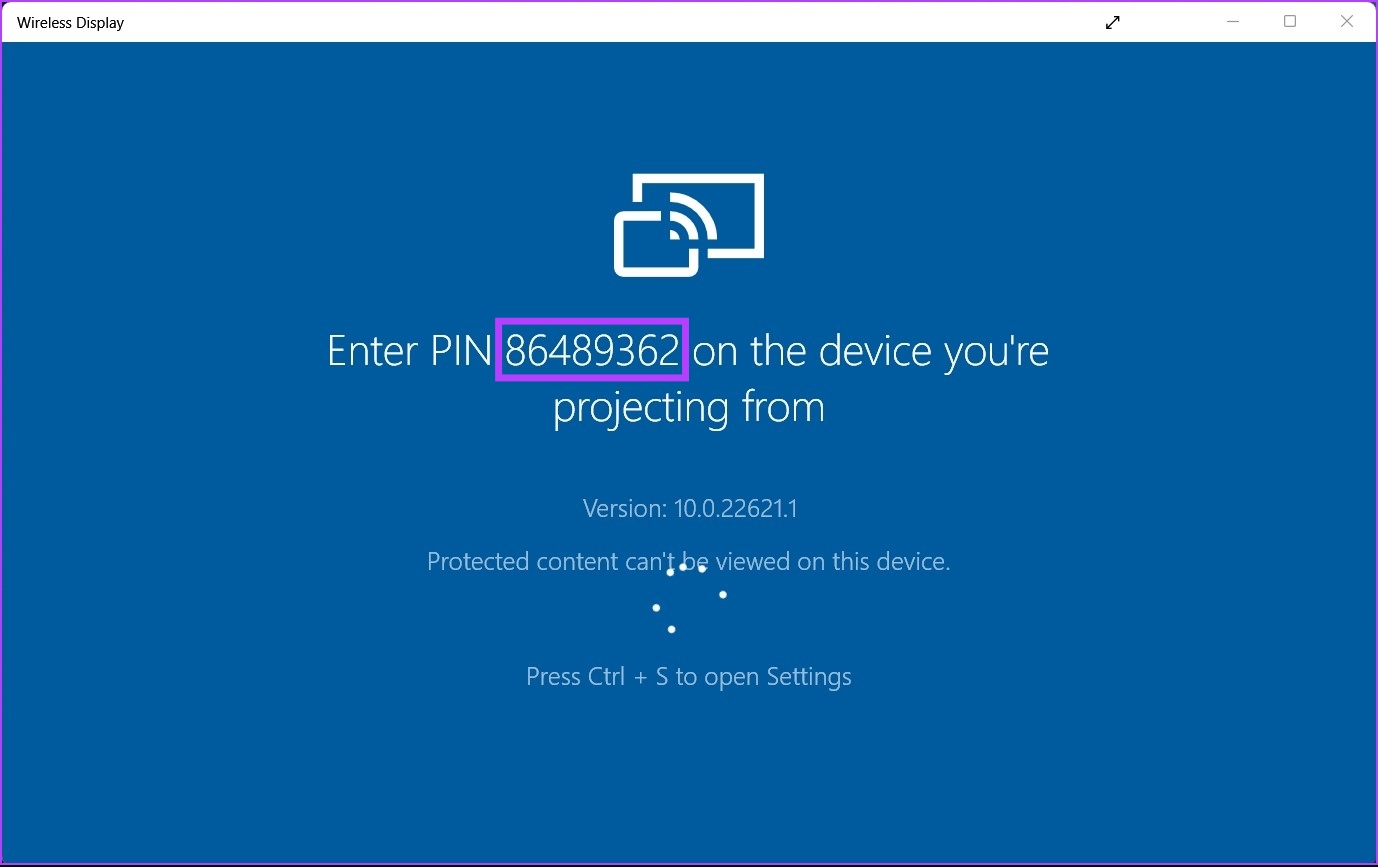
Step 6: Enter the 8-digit PIN from your PC’s screen, then tap Accept .
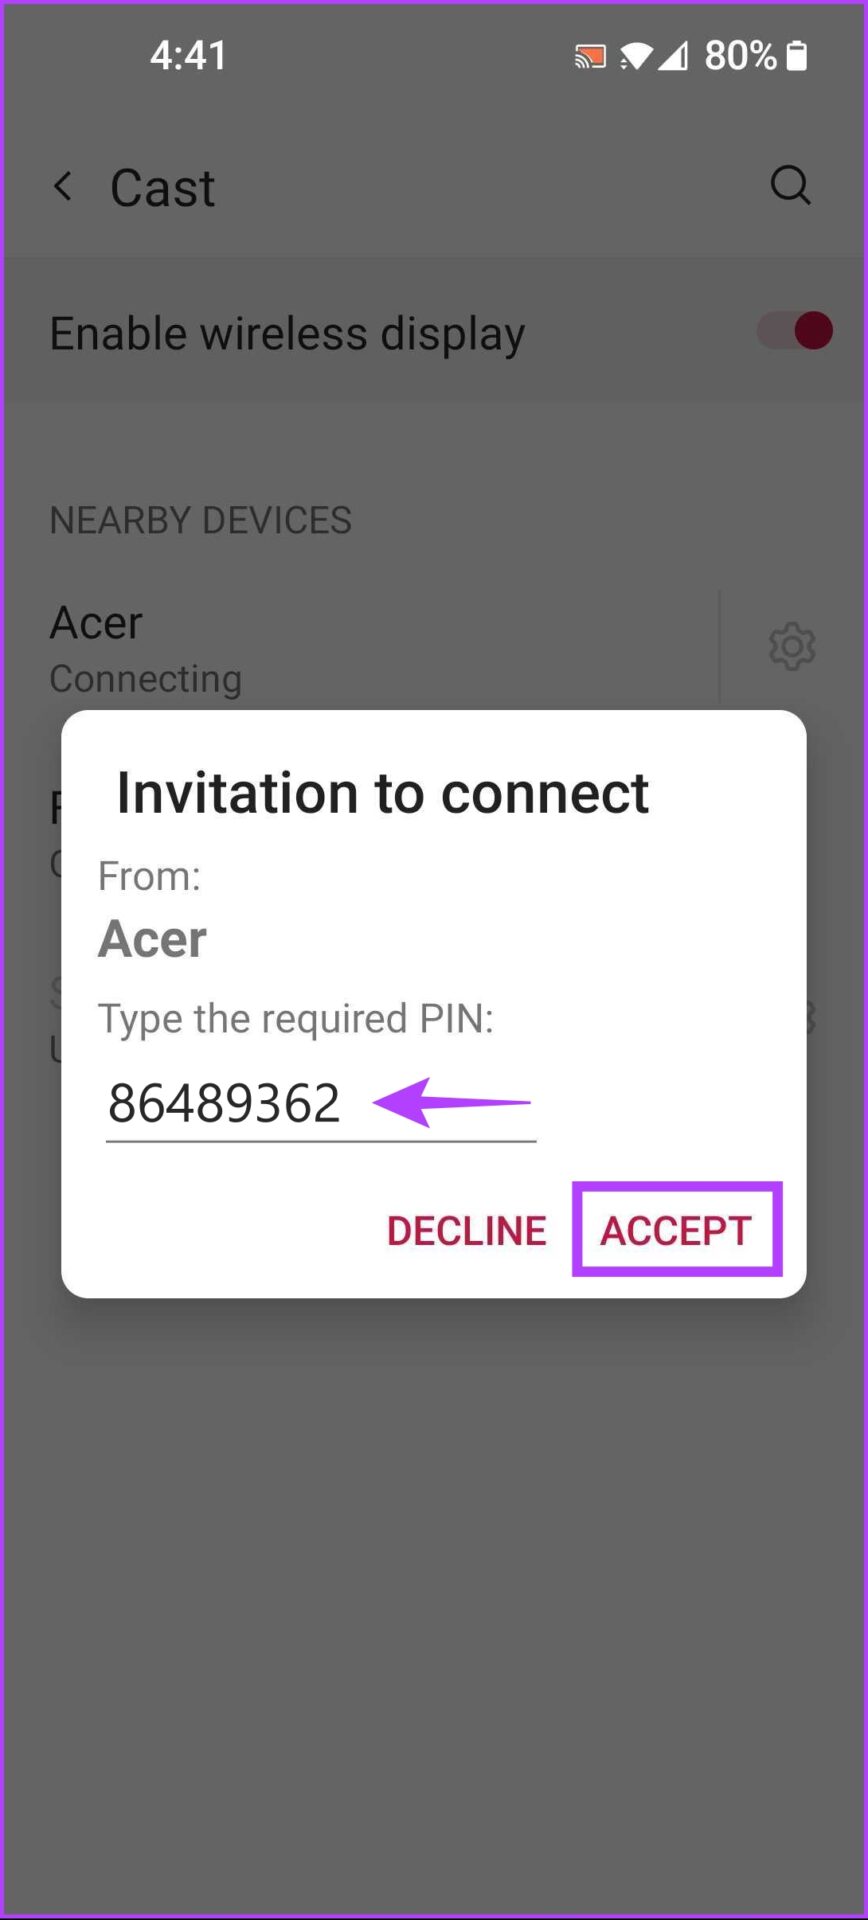
When you tap Accept, your Android phone’s interface should appear on your PC’s screen.
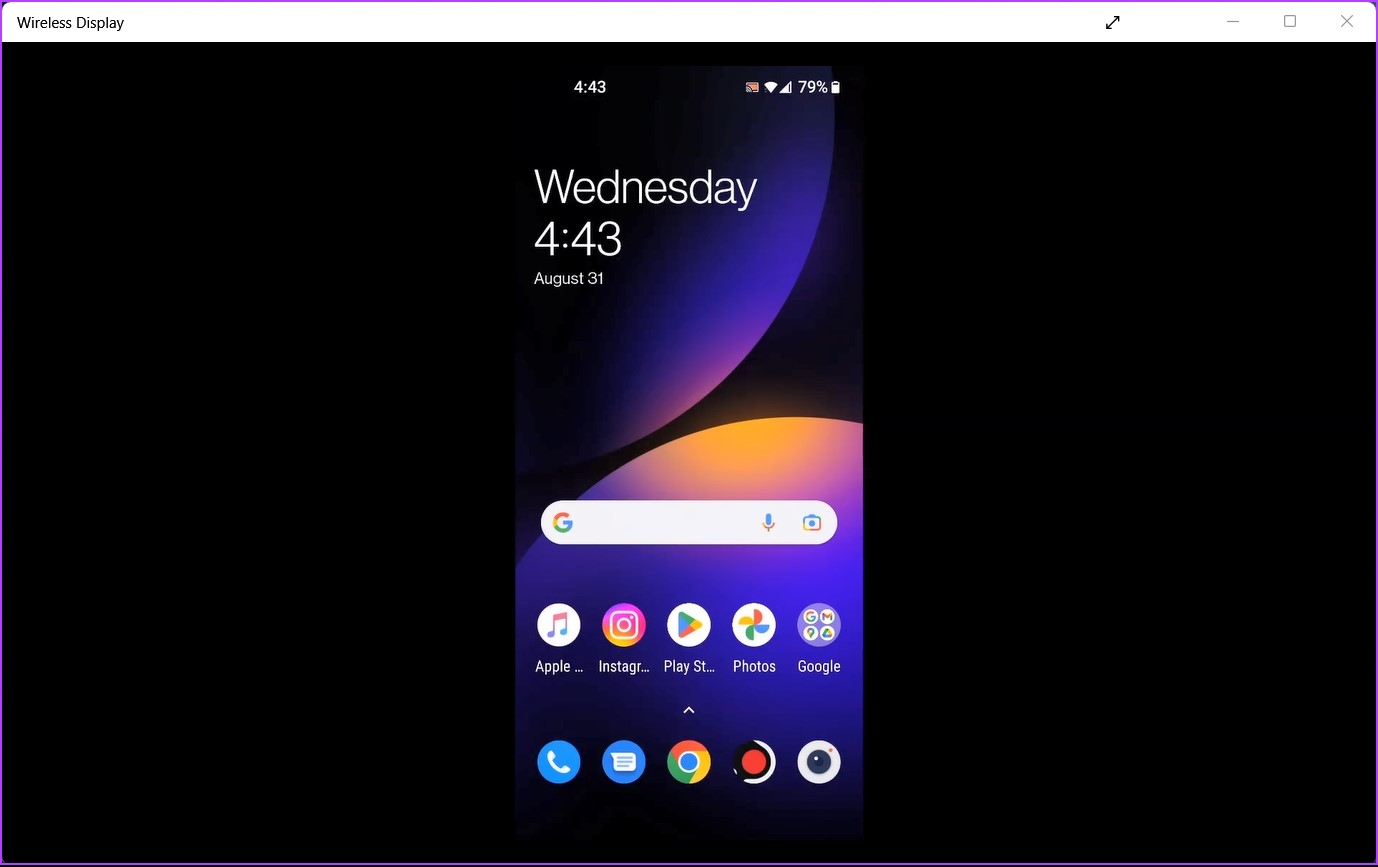
This way, you can mirror an Android smartphone onto your Windows 11 PC. However, if you can’t, ensure all devices are connected to the same wireless network.
Was this helpful?
Submit Cancel
Thanks for your feedback!
Keep reading