Android
2 Easy Ways to Clear DNS Cache on Android
Looking for a way to clear DNS cache on your Android device? Take a look at this article to easily do it on any web browser!
By Supreeth Koundinya
Quick Tips
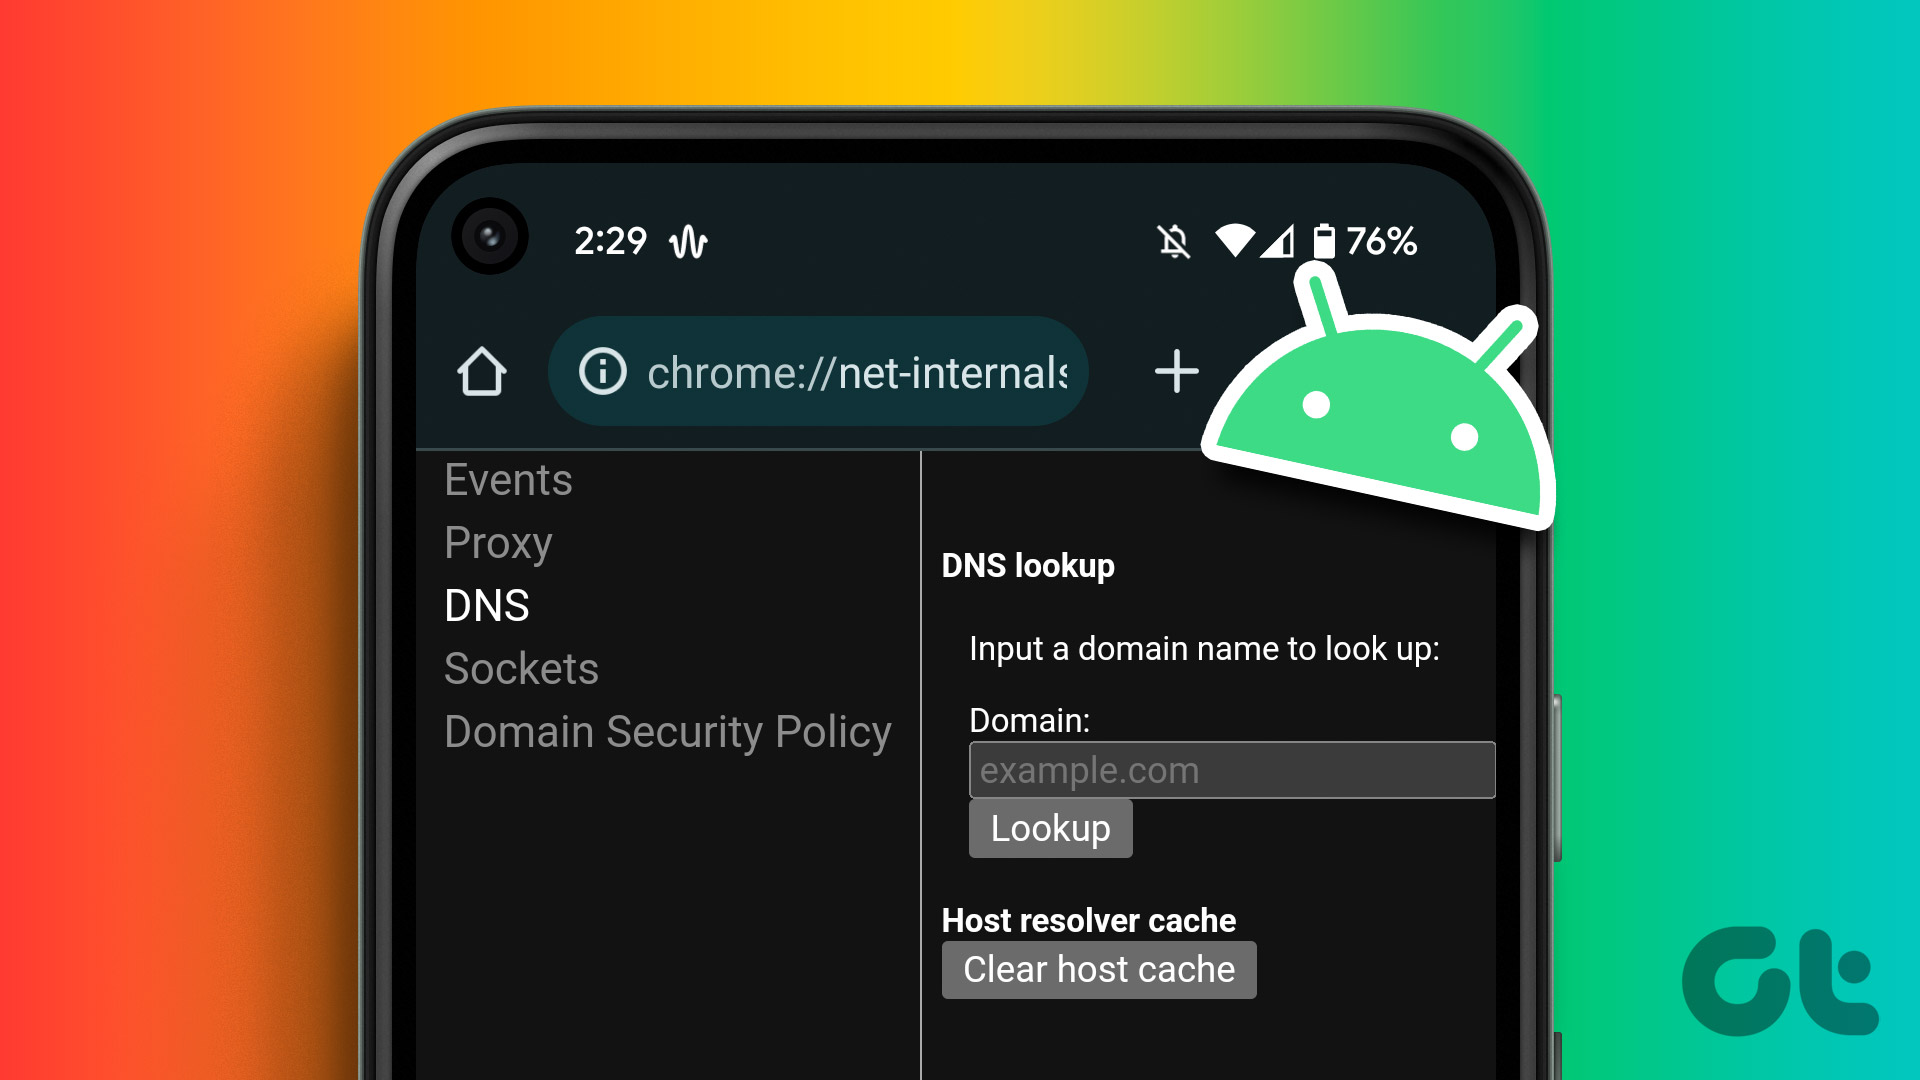
Open Chrome, enter chrome://net-internals/#dns in the URL bar, and tap on Clear Host Cache.
If you are using Edge or Brave browser, replace chrome with edge/brave in the above address.
If you are using any other web browser, clear the cache from the app settings to flush the DNS cache.
Method 1: Clear DNS Cache on Google Chrome, Microsoft Edge, and Brave Browser
Google Chrome , and other Chromium-based browsers on Android, namely Microsoft Edge and Brave, have an inbuilt option to clear the DNS cache. Here’s how you can do it.
Step 1: Open Chrome, Edge, or Brave on your Android device. Enter the following in the address bar :
If you are using Google Chrome :
chrome://net-internals/#dns
If you are using Microsoft Edge :
edge://net-internals/#dns
If you are using Brave:
brave://net-internals/#dns
Step 2: Tap on the Clear host cache button.
You will not get any further feedback, but doing this will clear the DNS cache on your web browser.

Also Read: How to fix Google Chrome not loading on Android
Method 2: Clear DNS Cache for Other Web Browsers
This method helps you clear the DNS cache from your Android device in all cases. That is irrespective of the web browser you are using.
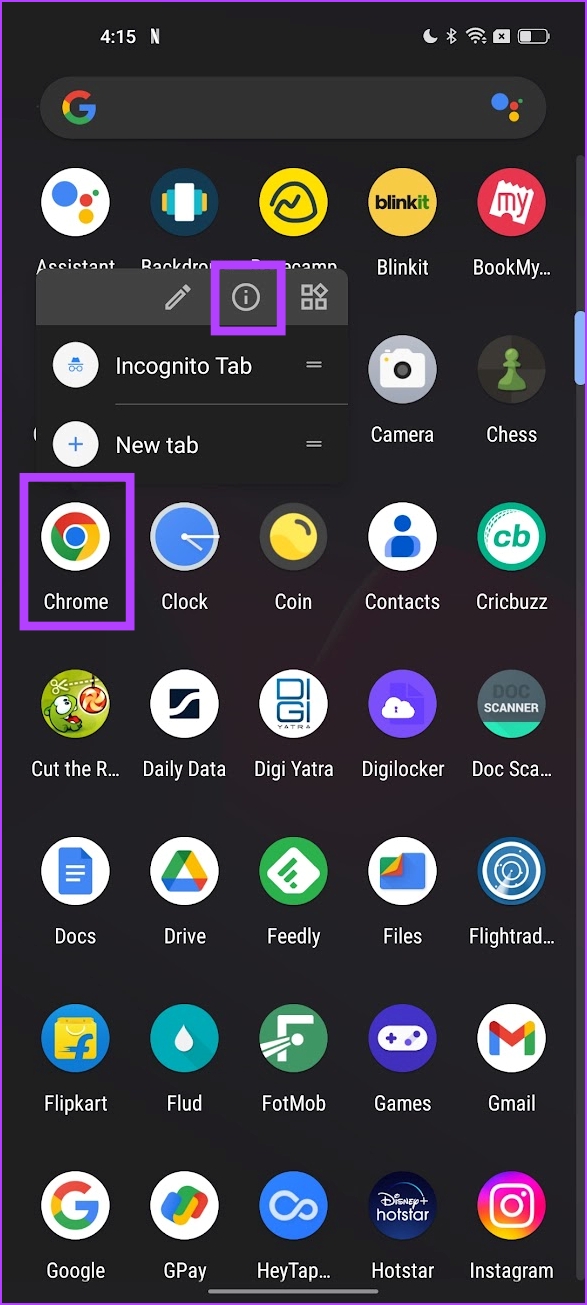
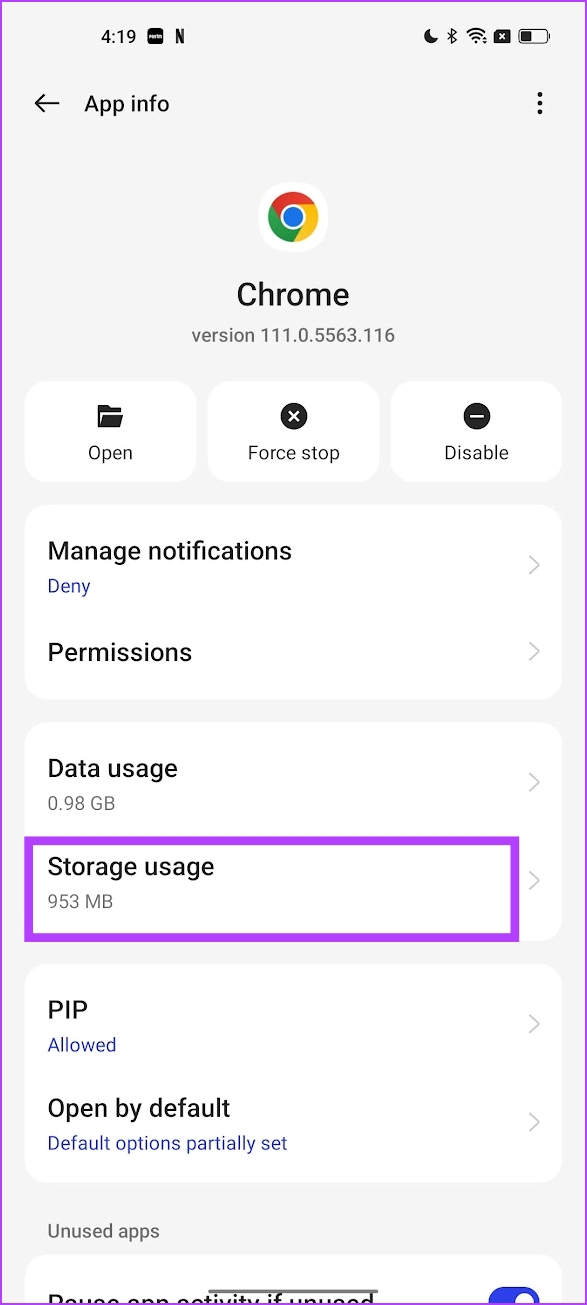
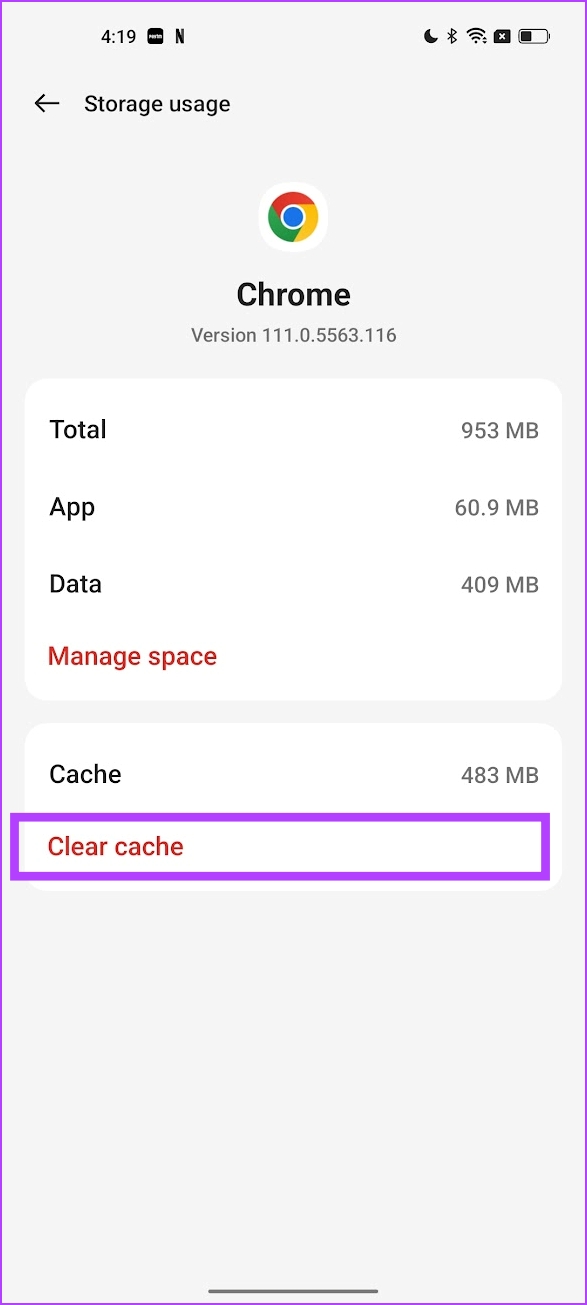
Tap and hold your default browser’s icon. Tap on App info > Storage Usage > Clear Cache .
Also Read: How to flush DNS cache on Windows
Was this helpful?
Submit Cancel
Thanks for your feedback!
Keep reading