Android
5 Ways to Fix Security Policy Prevents Camera Use on Android
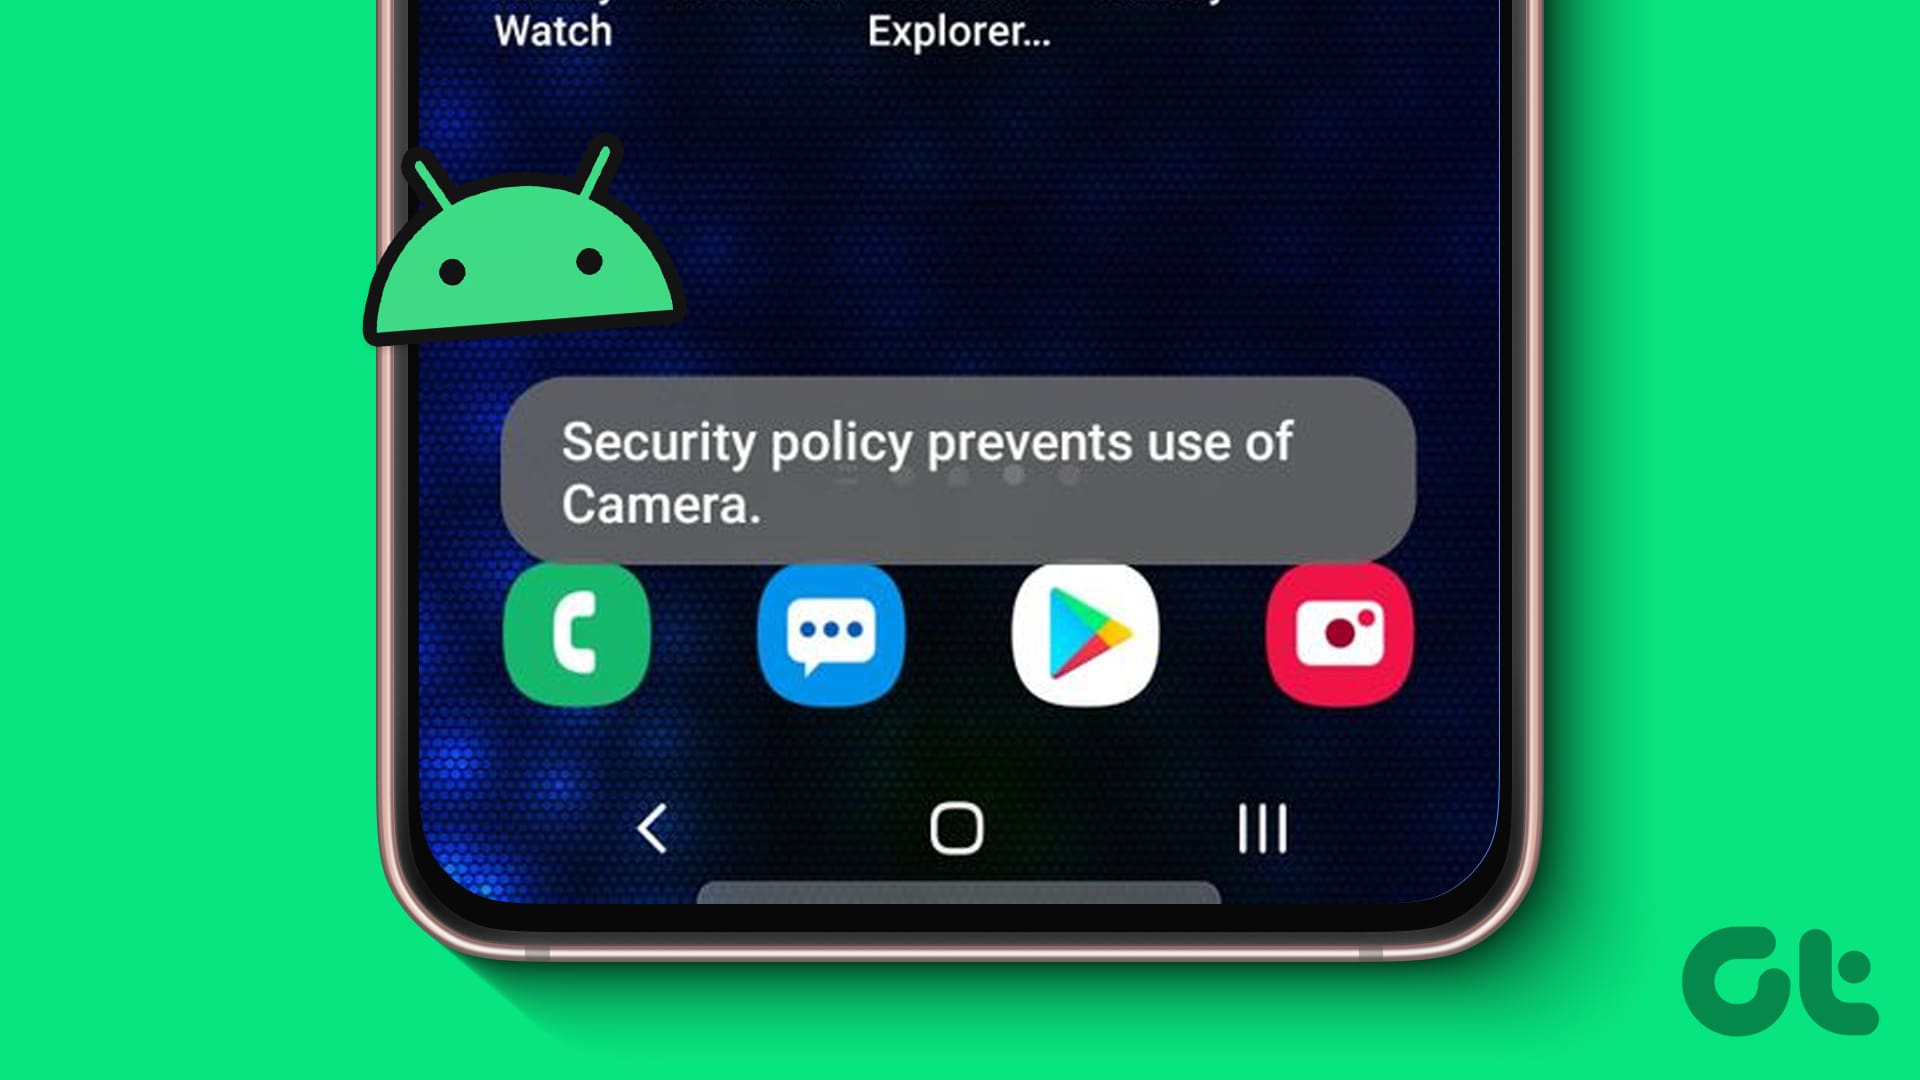
Do you see the "Security policy prevents camera use" error on your Android device? Here are seven ways to fix the issue!
By Supreeth Koundinya
Quick Tips
Go to Developer Options, and turn on Sensors Off. Open the quick settings panel, and turn on and turn off the Sensors Off tile.
Clear cache and data from the Camera app to remove junk and corrupted files.
Ensure the Camera app has all the necessary permissions on your device.
Fix 1: Turn Off Sensors and On Again
Your Android phone has a hidden option that lets you turn off all the sensors, and the camera sensor is one of them. If the software complementing the camera sensor is affected by a bug, then turning the sensor off and on again will help you fix the issue.
We first need to enable developer options.
Note : These are experimental features meant for development. Proceed with caution and at your own risk.
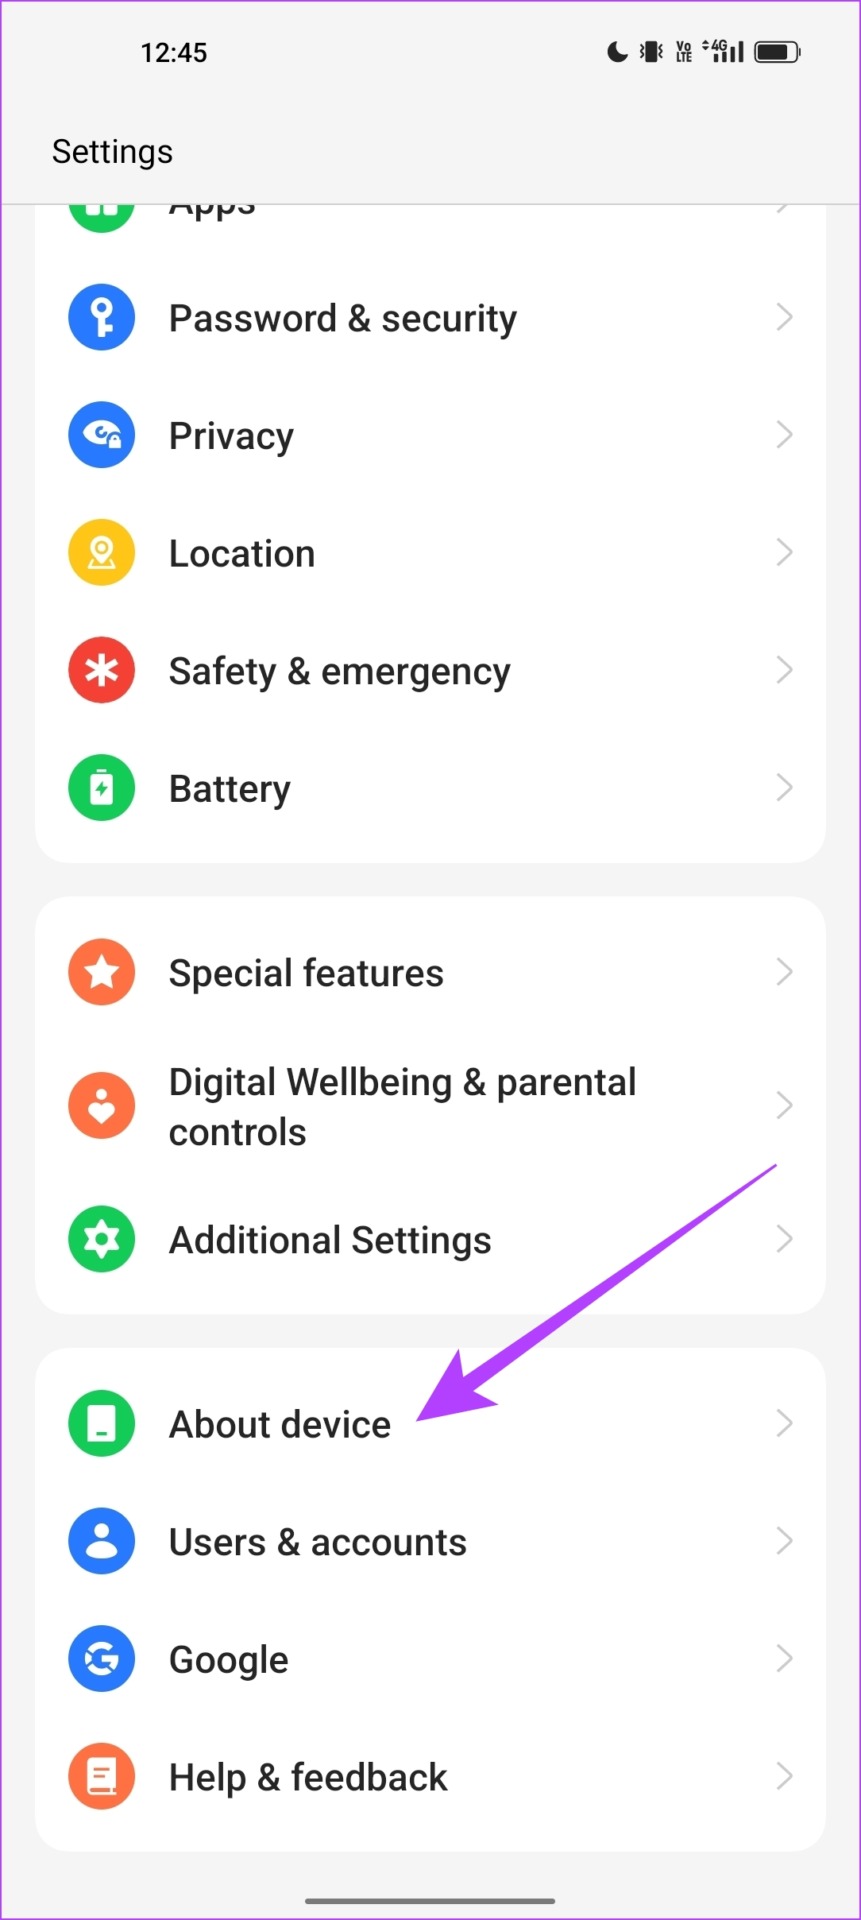
Step 1: Open the Settings app and tap on About Device .
Step 2: Tap on Version .
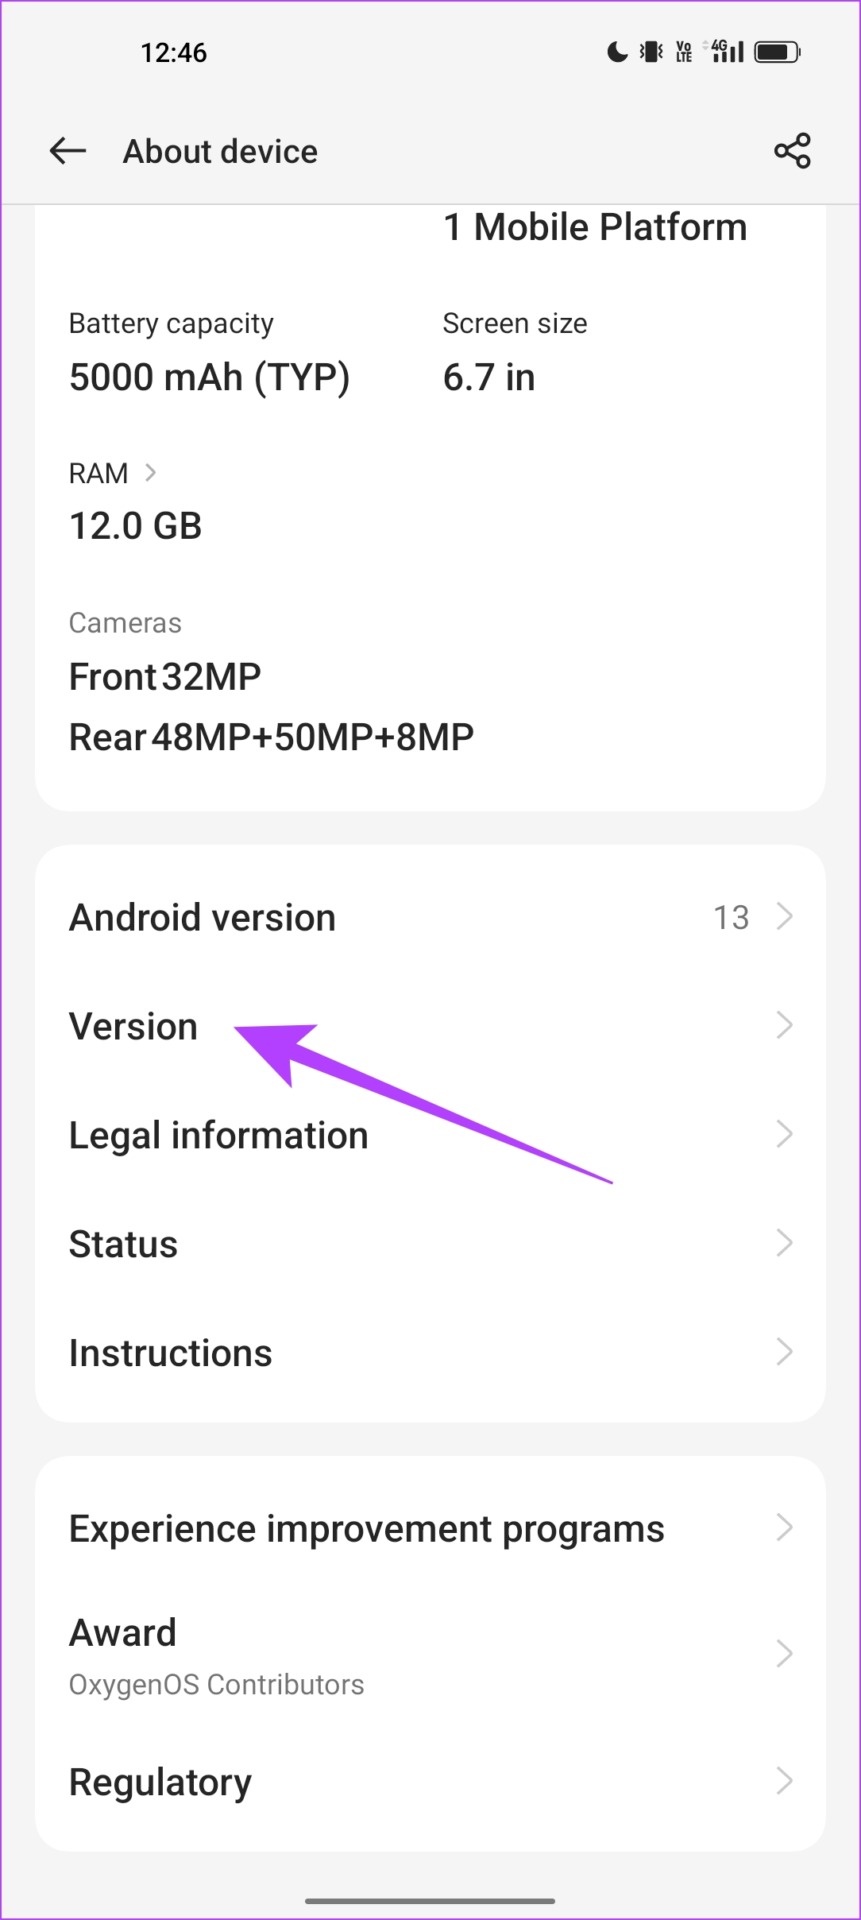
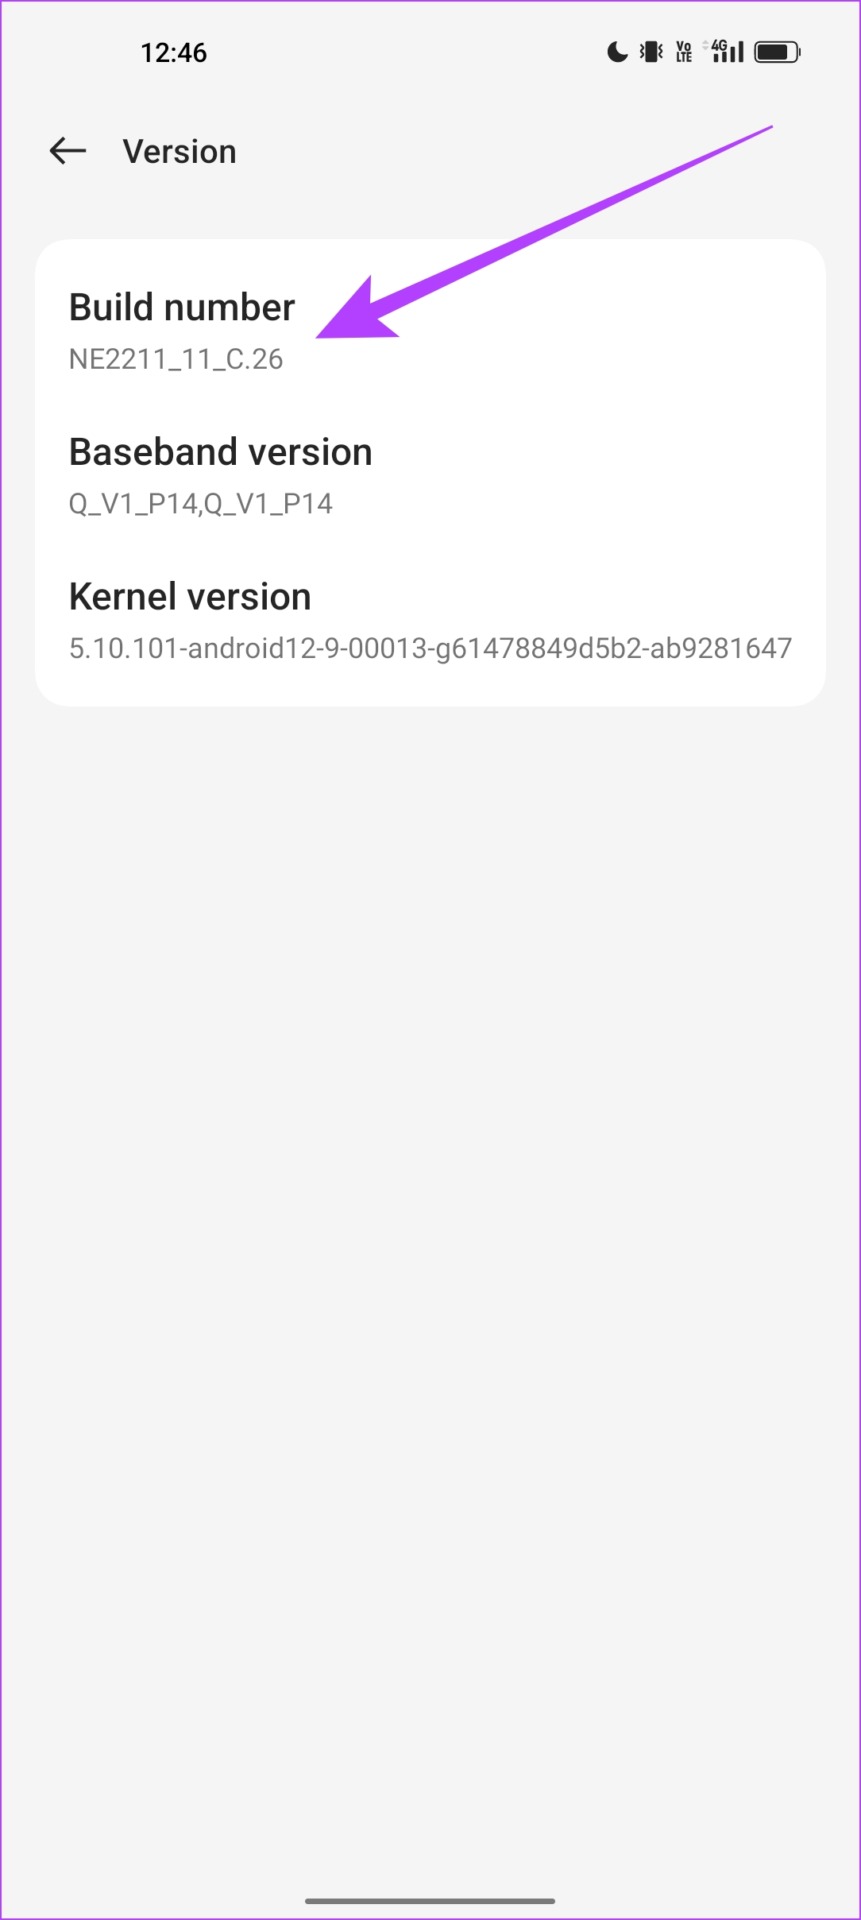
Step 3: Tap several times on the Build number until you get a message saying, ‘You are now in Developer mode!’
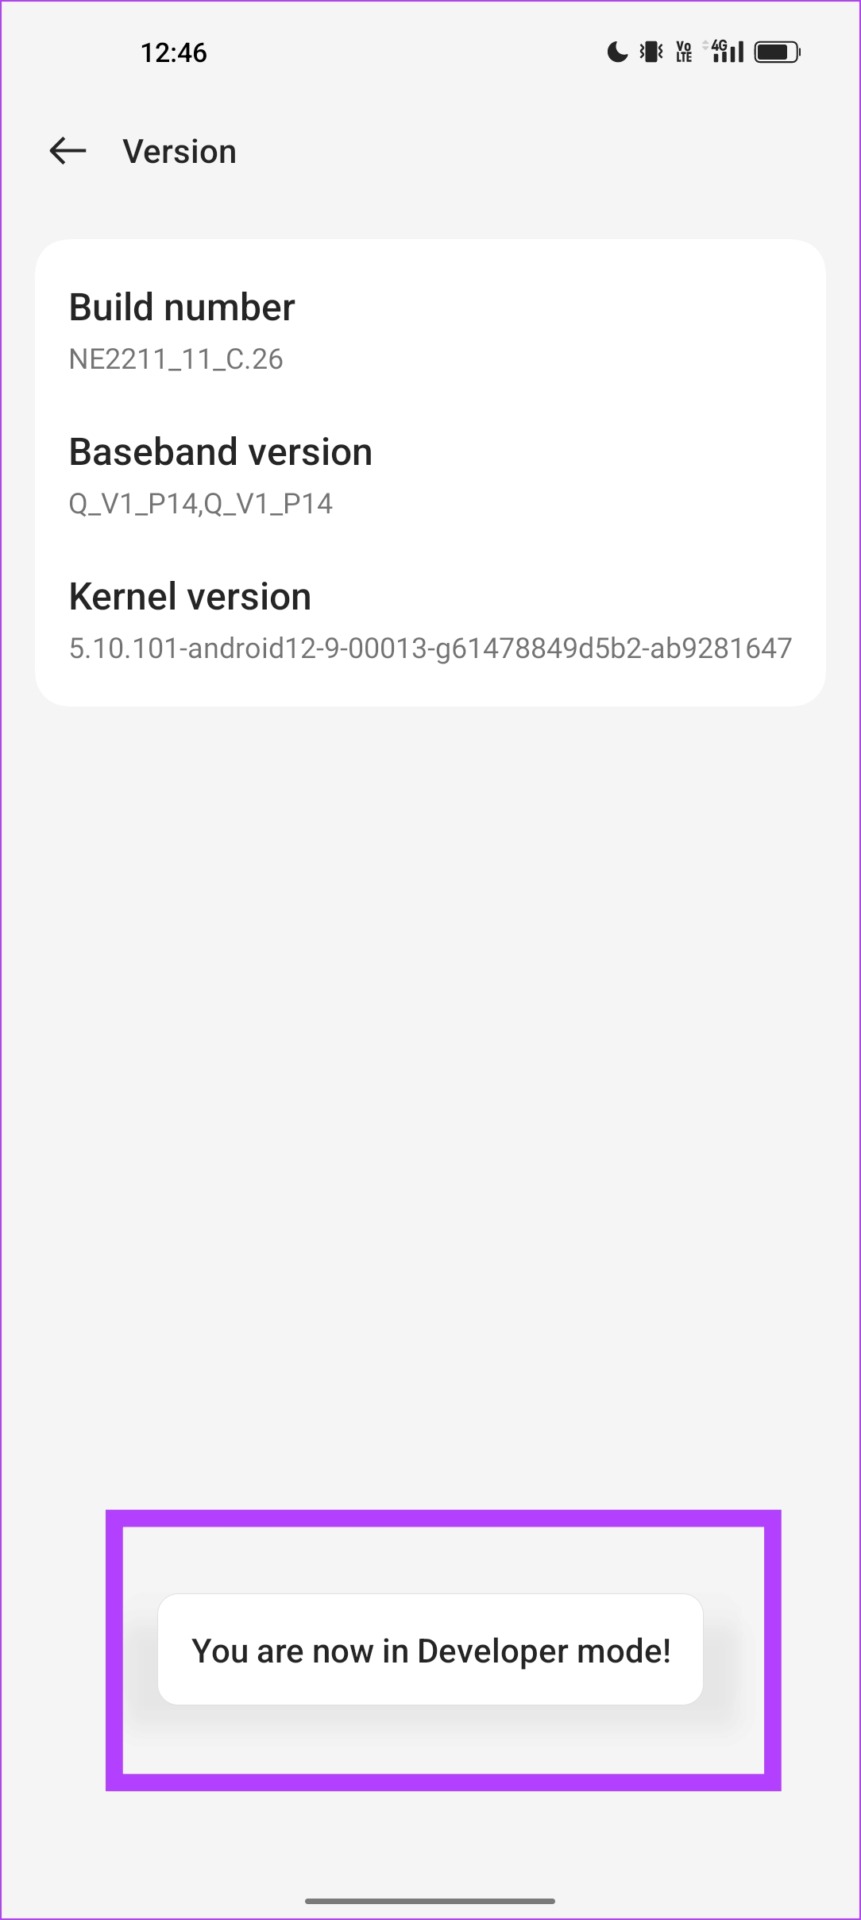
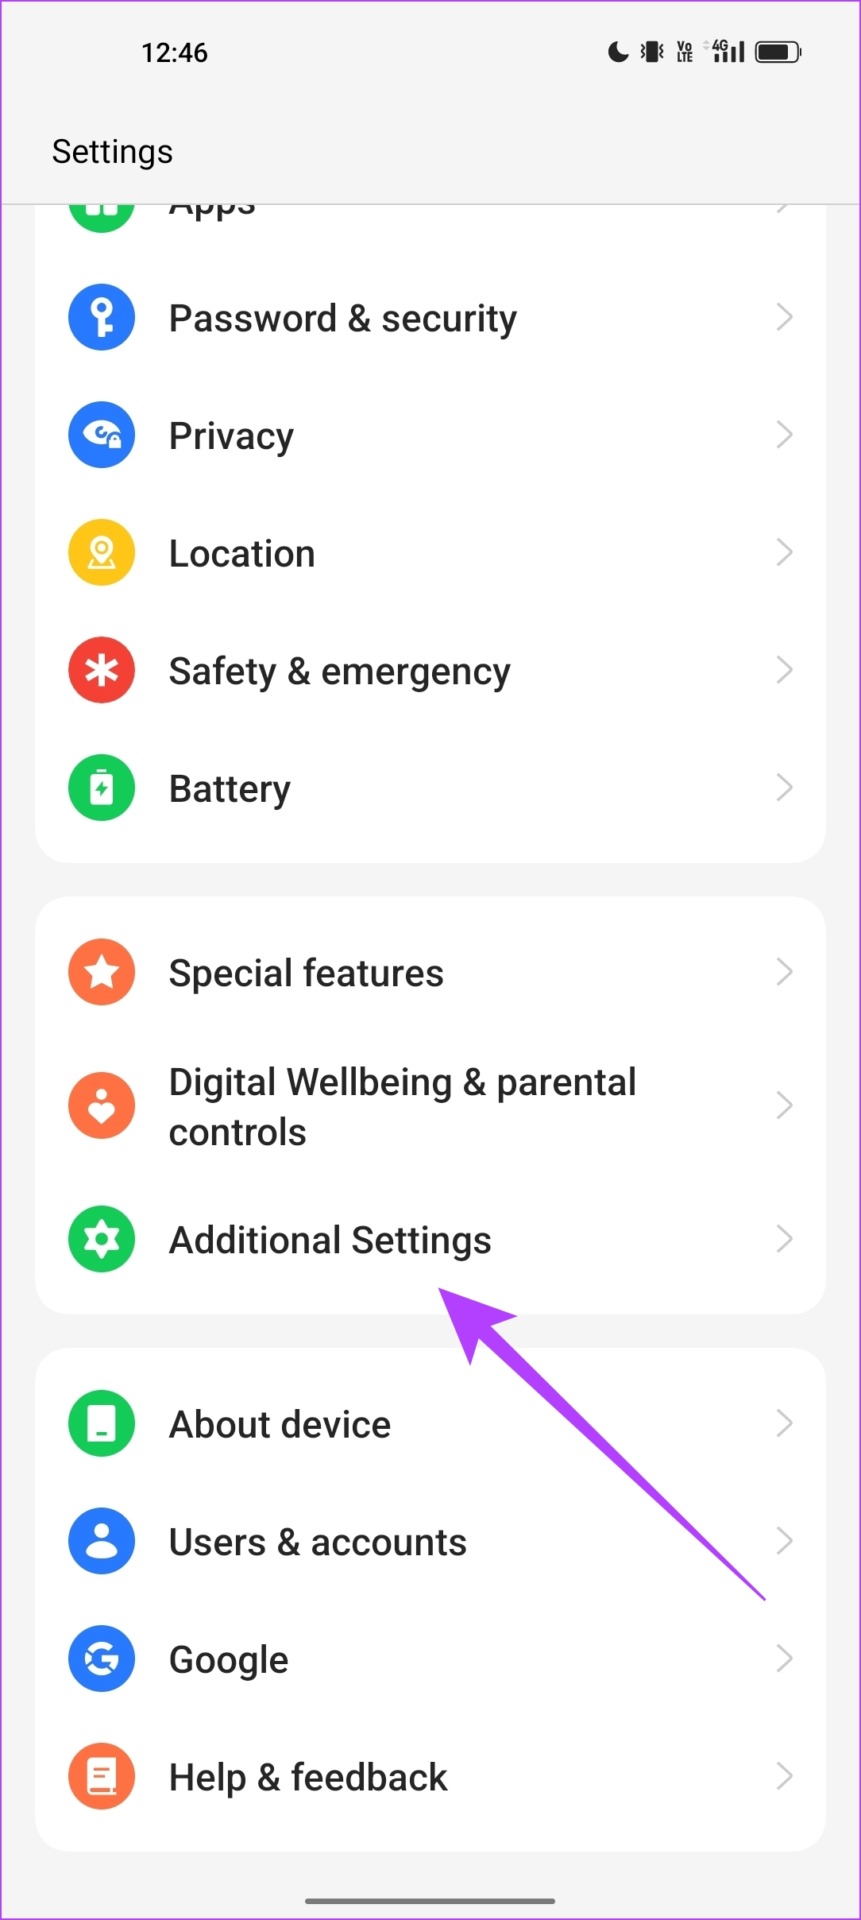
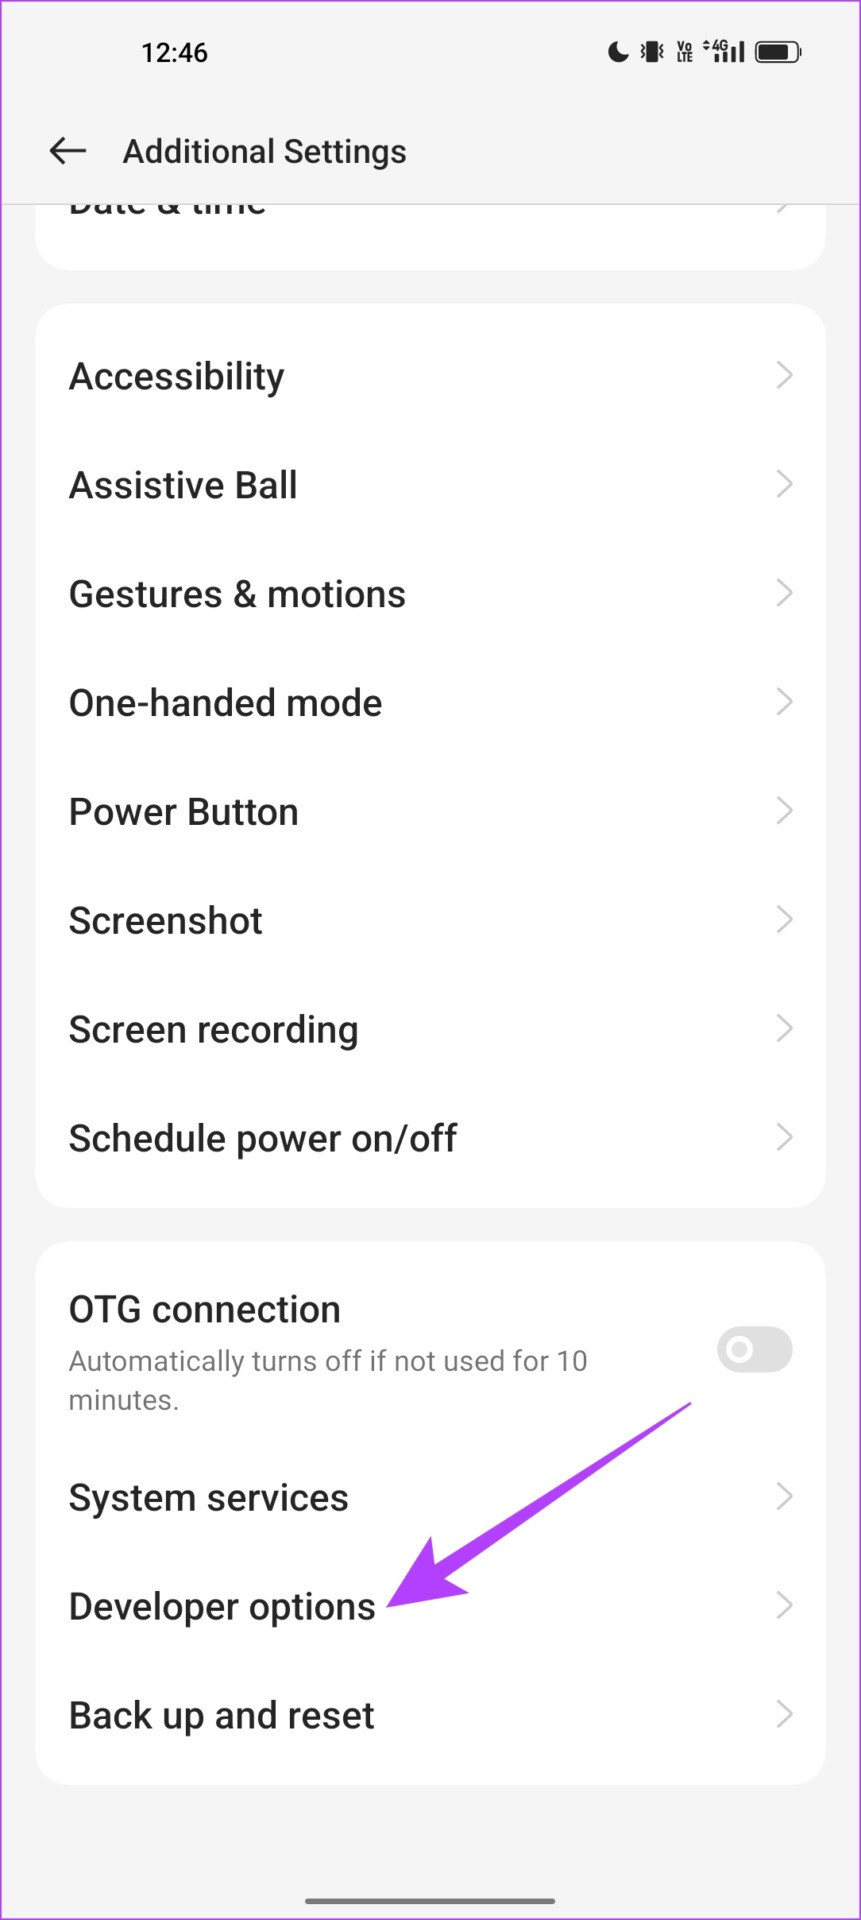
Step 4: We now need to open developer options. Open the Additional Settings menu in the settings app.
Step 5: Tap on Developer options .
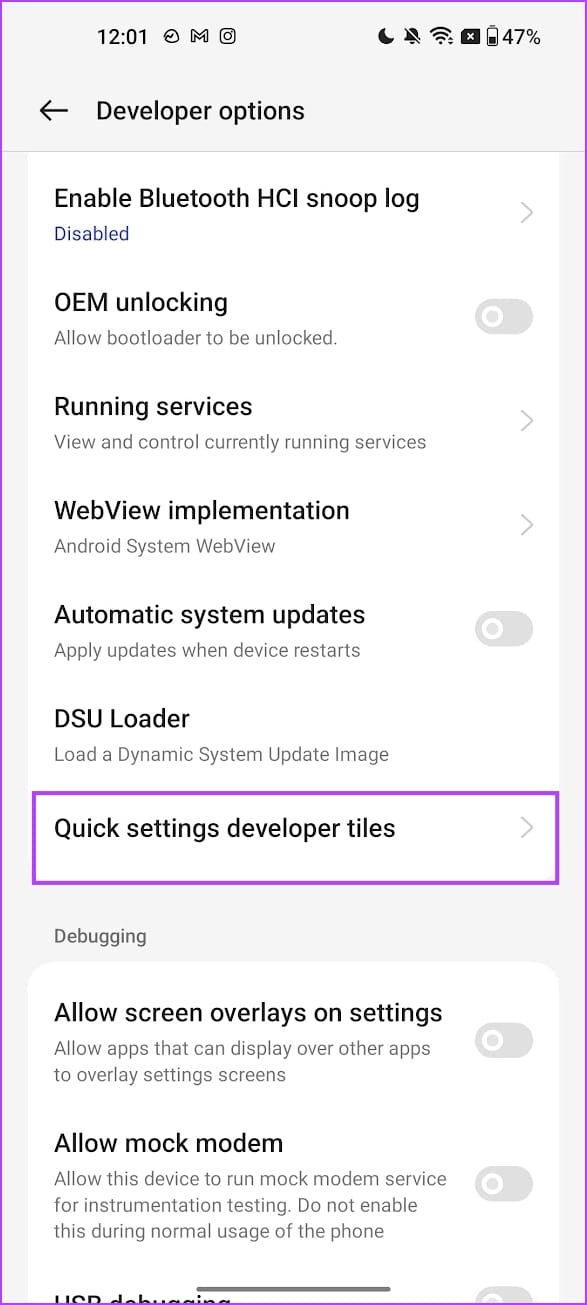
Step 6: Tap on Quick settings developer tiles.
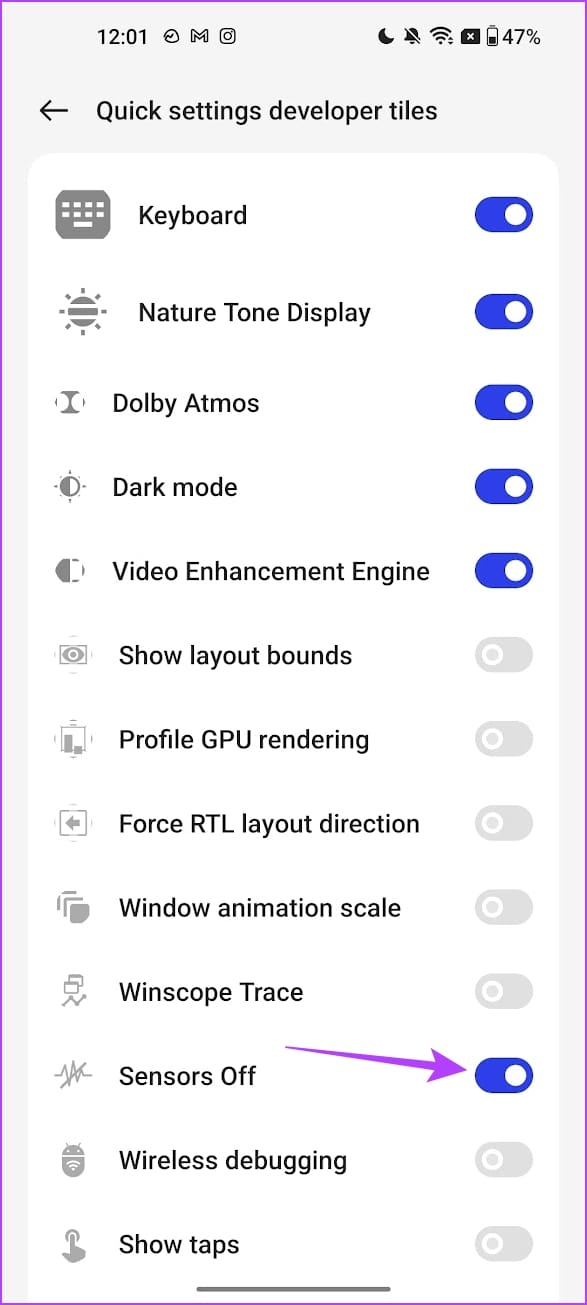
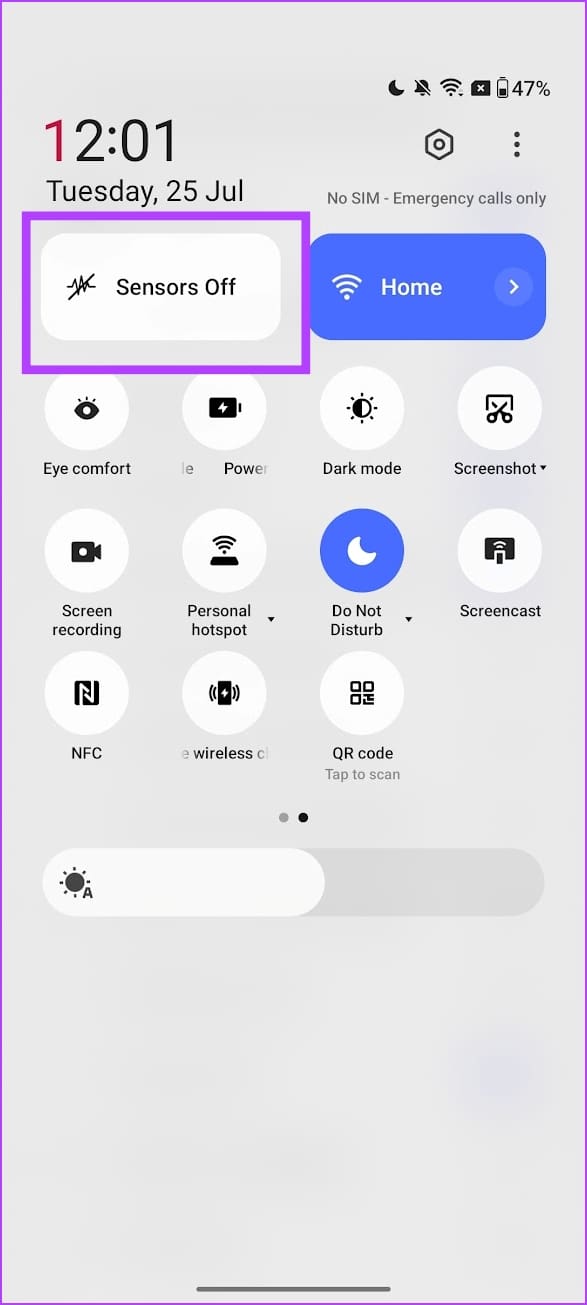
Step 7: Turn on the Sensors Off . Open the quick settings menu , and turn on the Sensors Off button to disable the sensors.
Step 8: After a few seconds, turn off the Sensors Off button.
Fix 2: Enable Permissions For the Camera App
If your camera app does not have permission to use the camera sensors, you can’t use the app and capture photos.
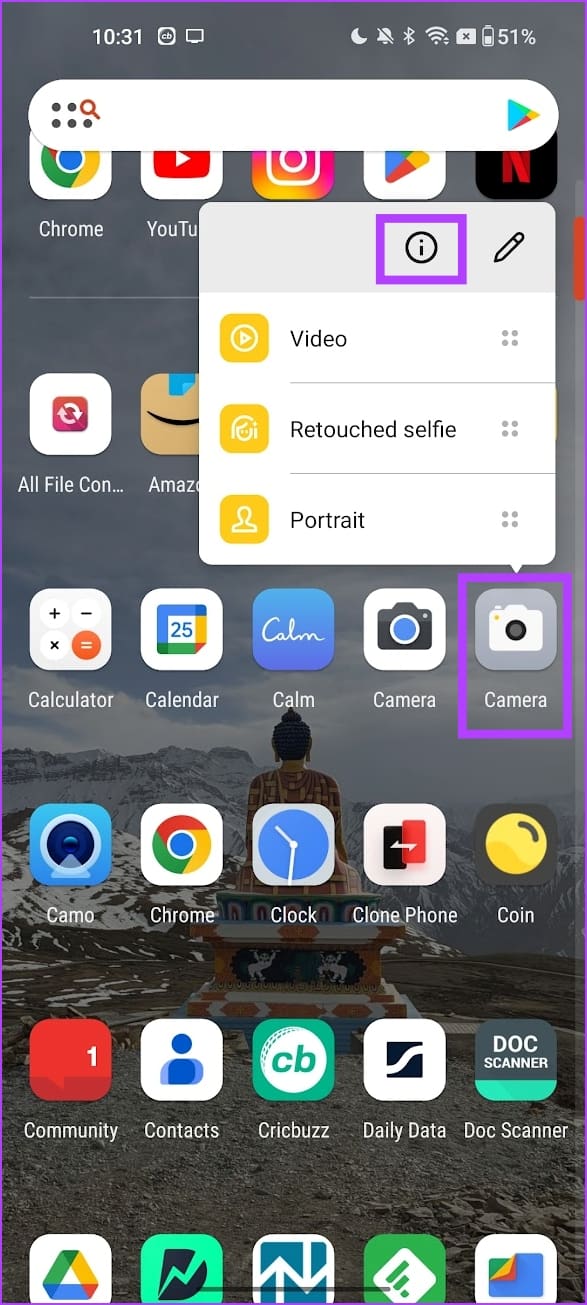
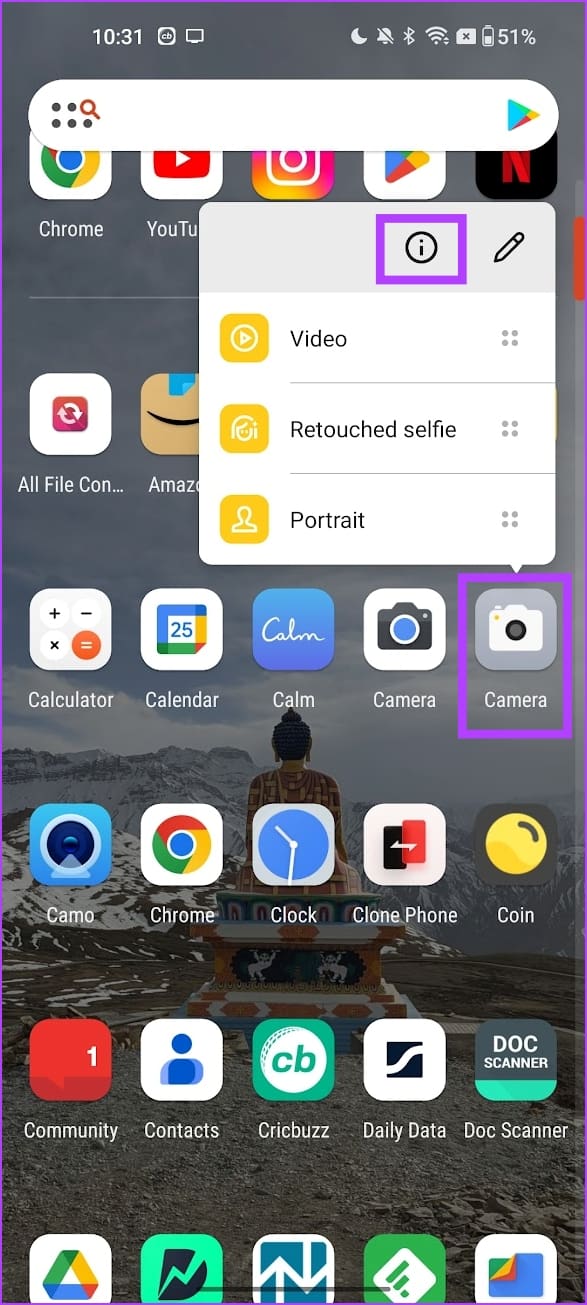
Step 1: Tap and hold on the Camera app icon in your app drawer. Tap on the app info icon.
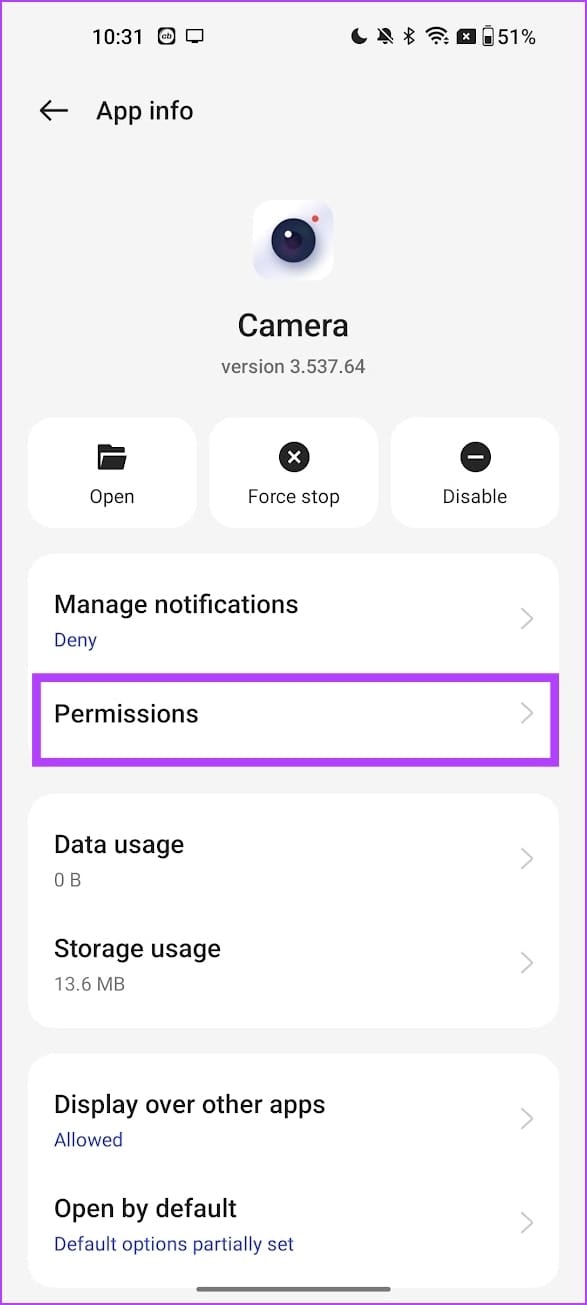
Step 2: Tap on Permissions .
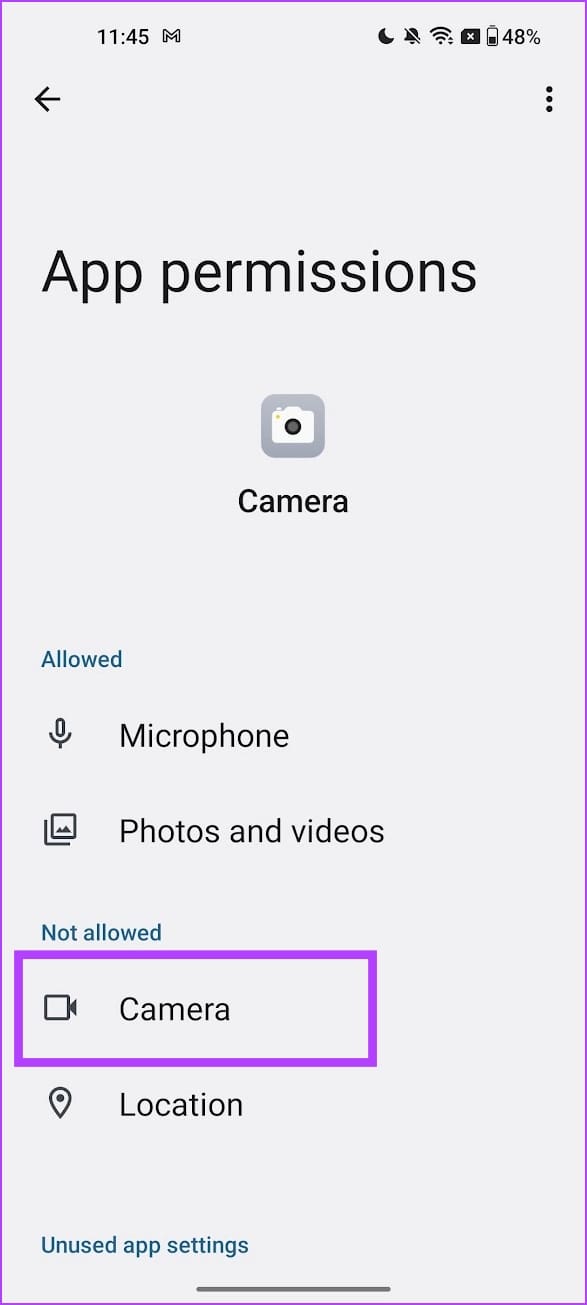
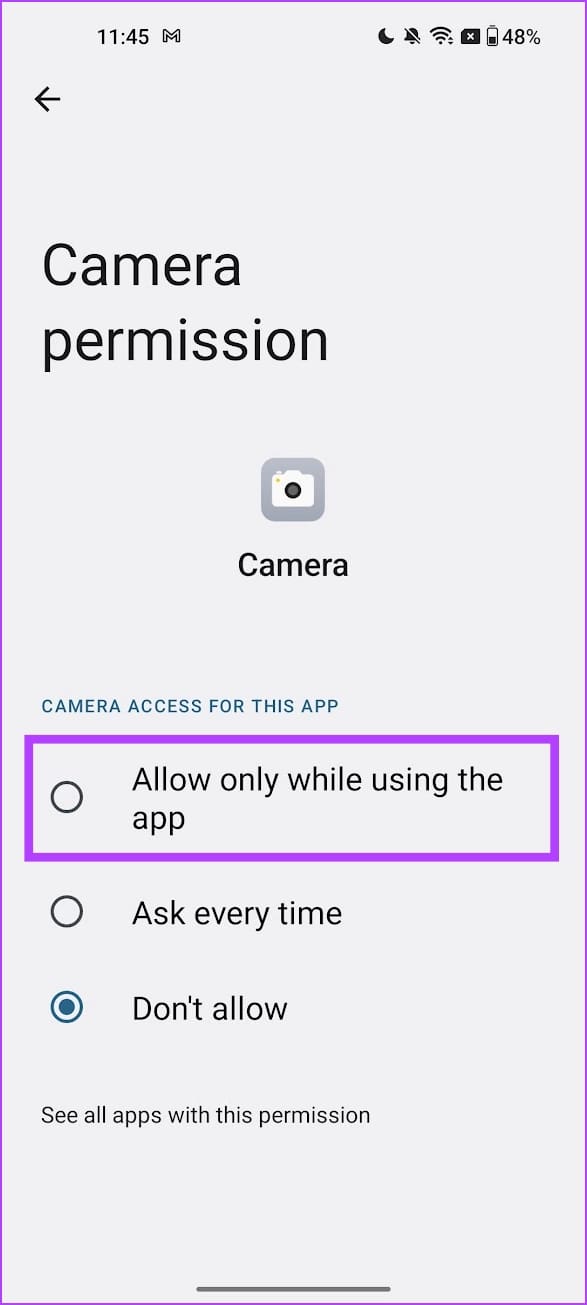
Step 3: Make sure that the Camera permissions are not under the ‘Not Allowed’ section. If it is, select Camera and tap on the Allow only while using the app option.
Fix 3: Clear Cache
The cache storage has temporary files and components offline to help the app reload quickly. However, cache data accumulated over time can result in junk files that can execute bugs.
Step 1: Tap and hold the Camera app icon in your app drawer. Tap on the app info icon.
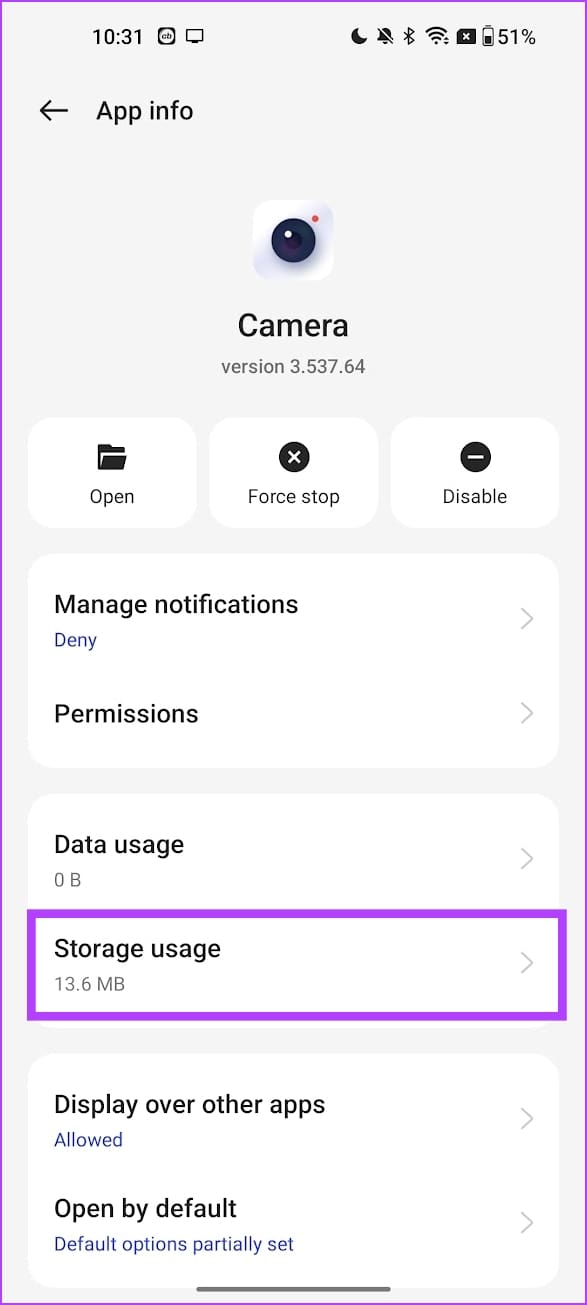
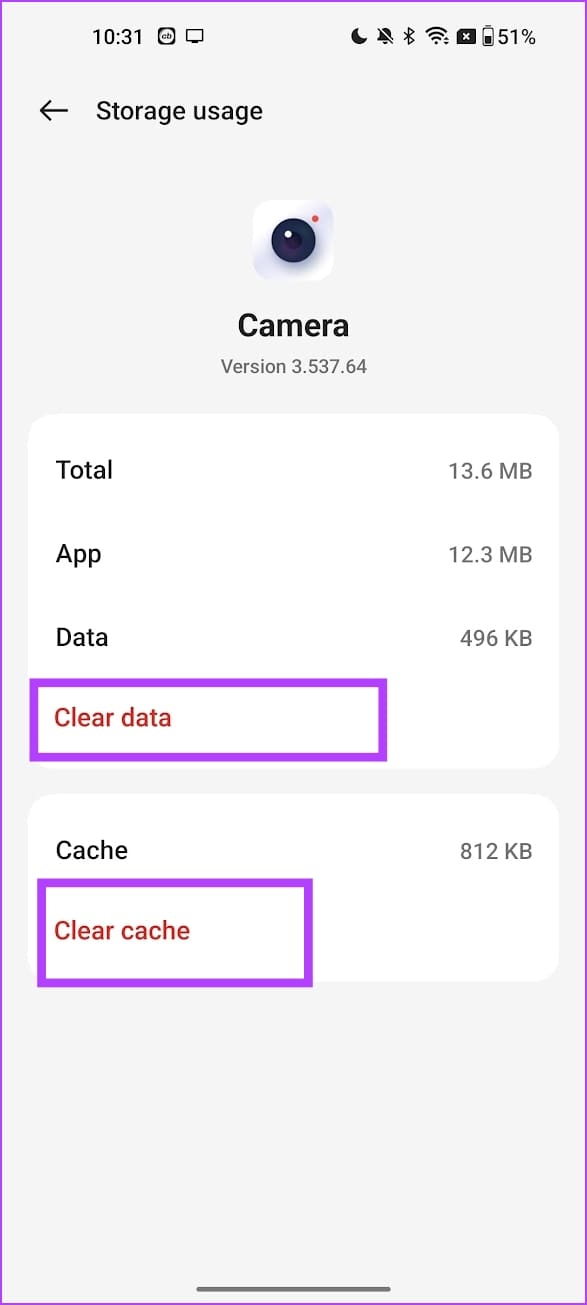
Step 2: Tap on Storage Usage . Tap on Clear cache and Clear data .
Note : Once you clear the data, all your camera settings will reset to the default.
Fix 4: Disable and Enable the Camera App
Disabling the Camera app can clear all the data and return the app to its initial state. Therefore, this can eliminate any bugs affecting the camera app. Here’s how to disable the camera app and enable it again.
Note : If you disable an app, all the data and cache will be cleared. This means that all the camera settings will reset.
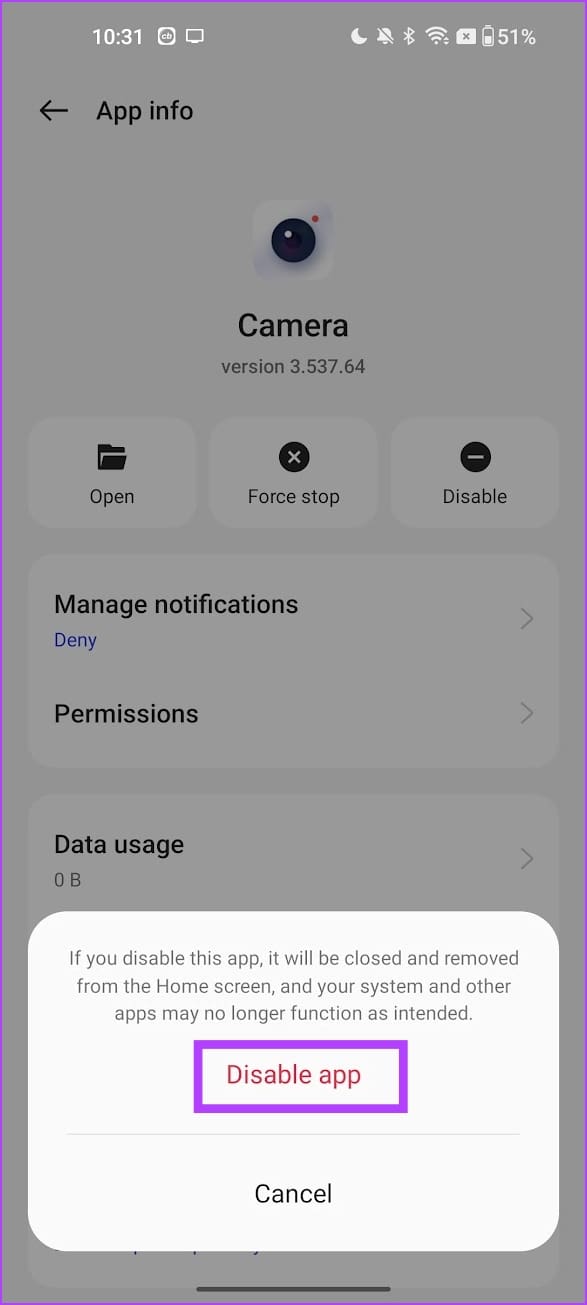
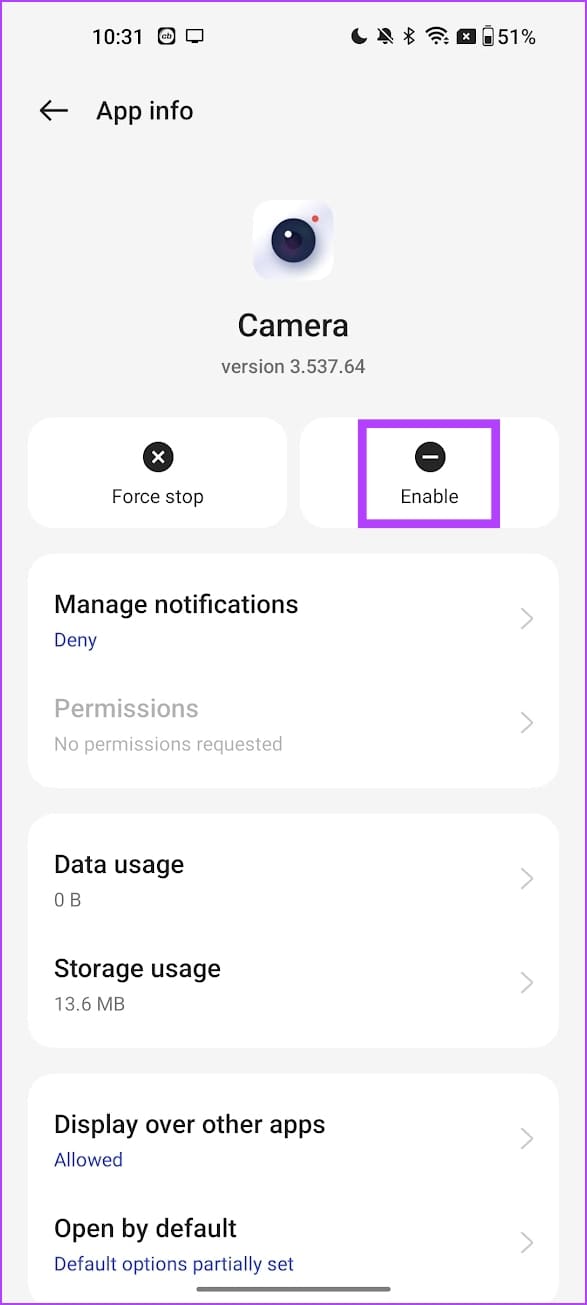
Step 1: Tap and hold the Camera app icon in your app drawer. Tap on the app info icon. Tap on Disable .
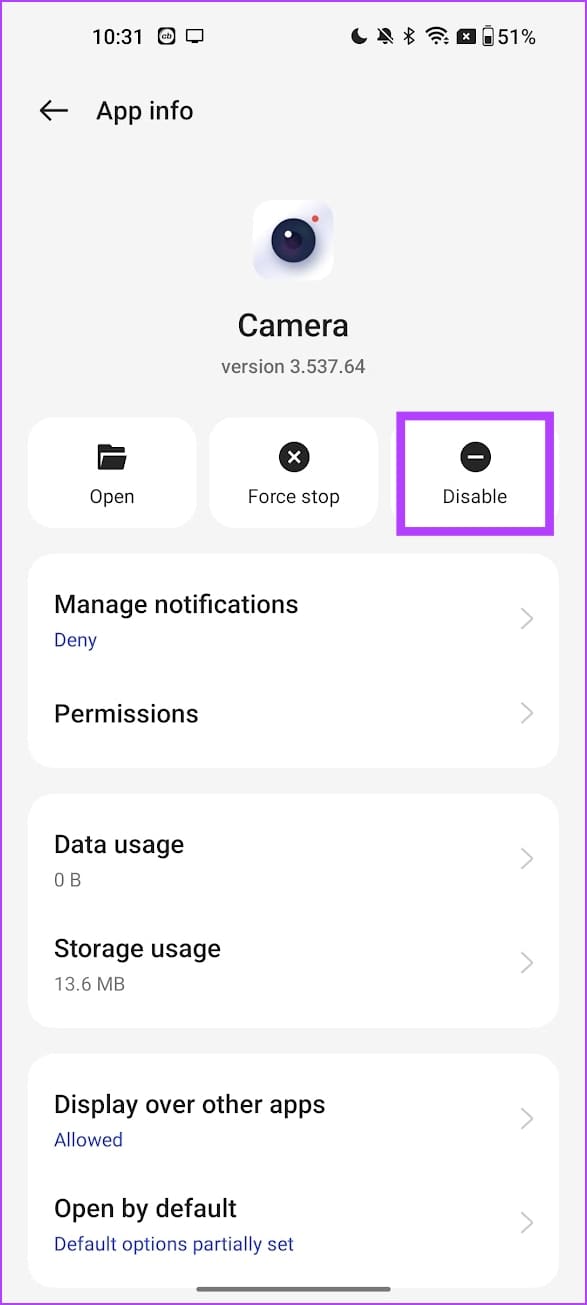
Step 2: Tap on Disable App to confirm. Now, tap on Enable to enable the app again.
Fix 5: Reset Device
If none of the above methods work, you may reset your Android device. This resets all the settings and configurations to their default states.
Note: Doing this will remove any customizations, and settings applied manually on your device, along with removing all network preferences.
Step 1: Open the Settings app, and go to Additional Settings .
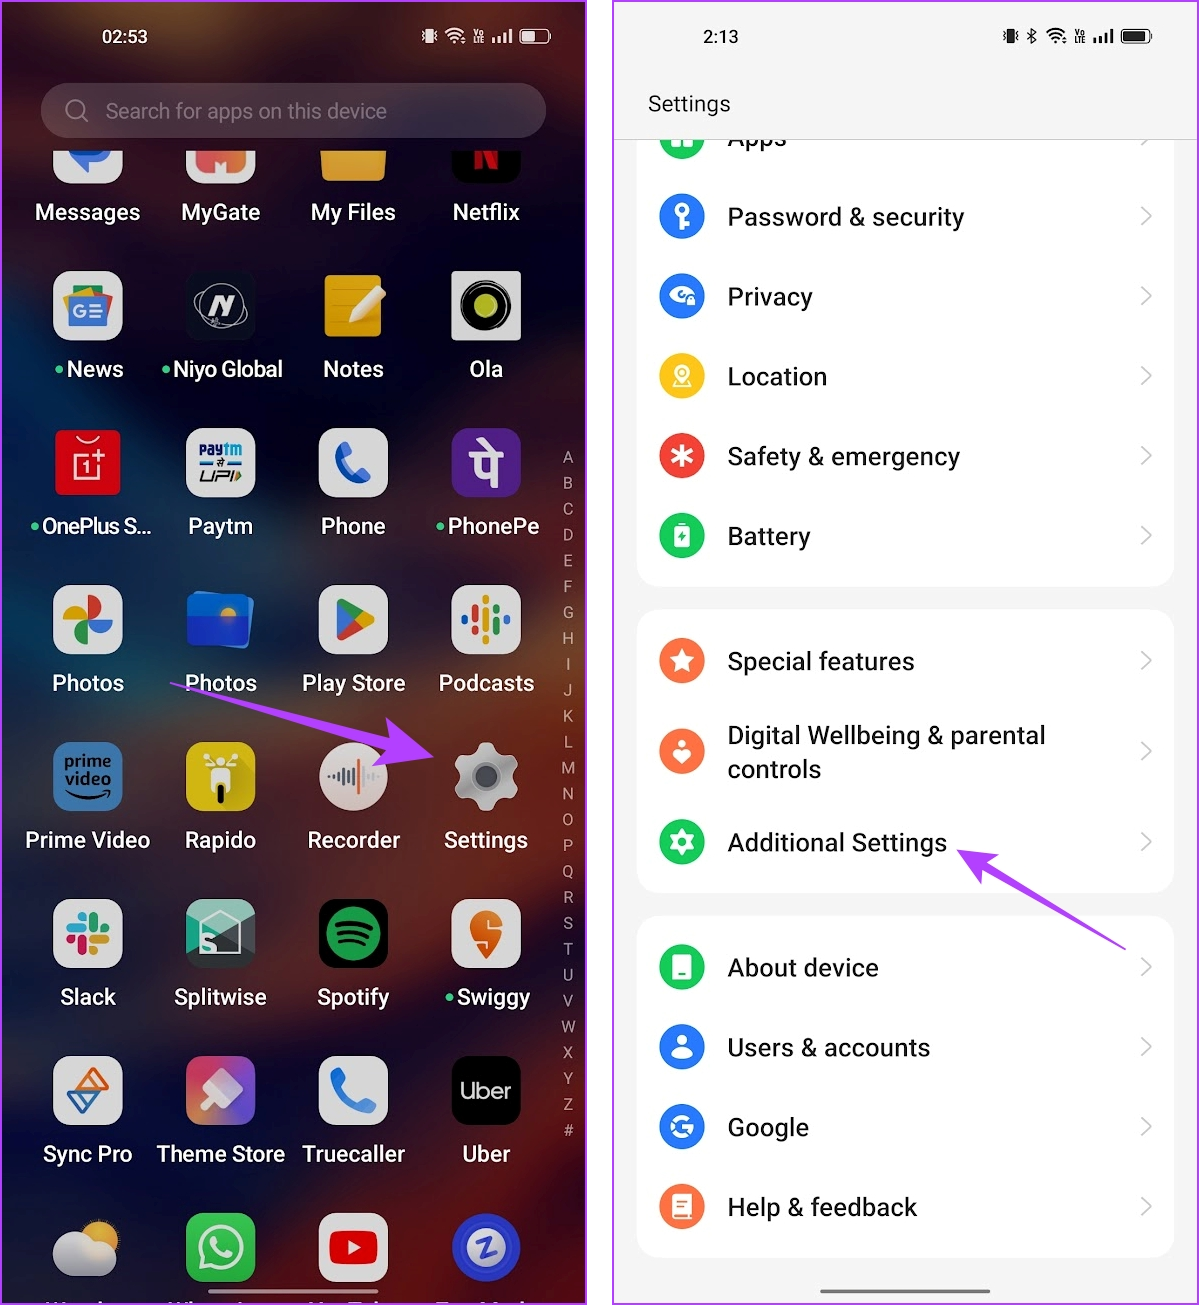
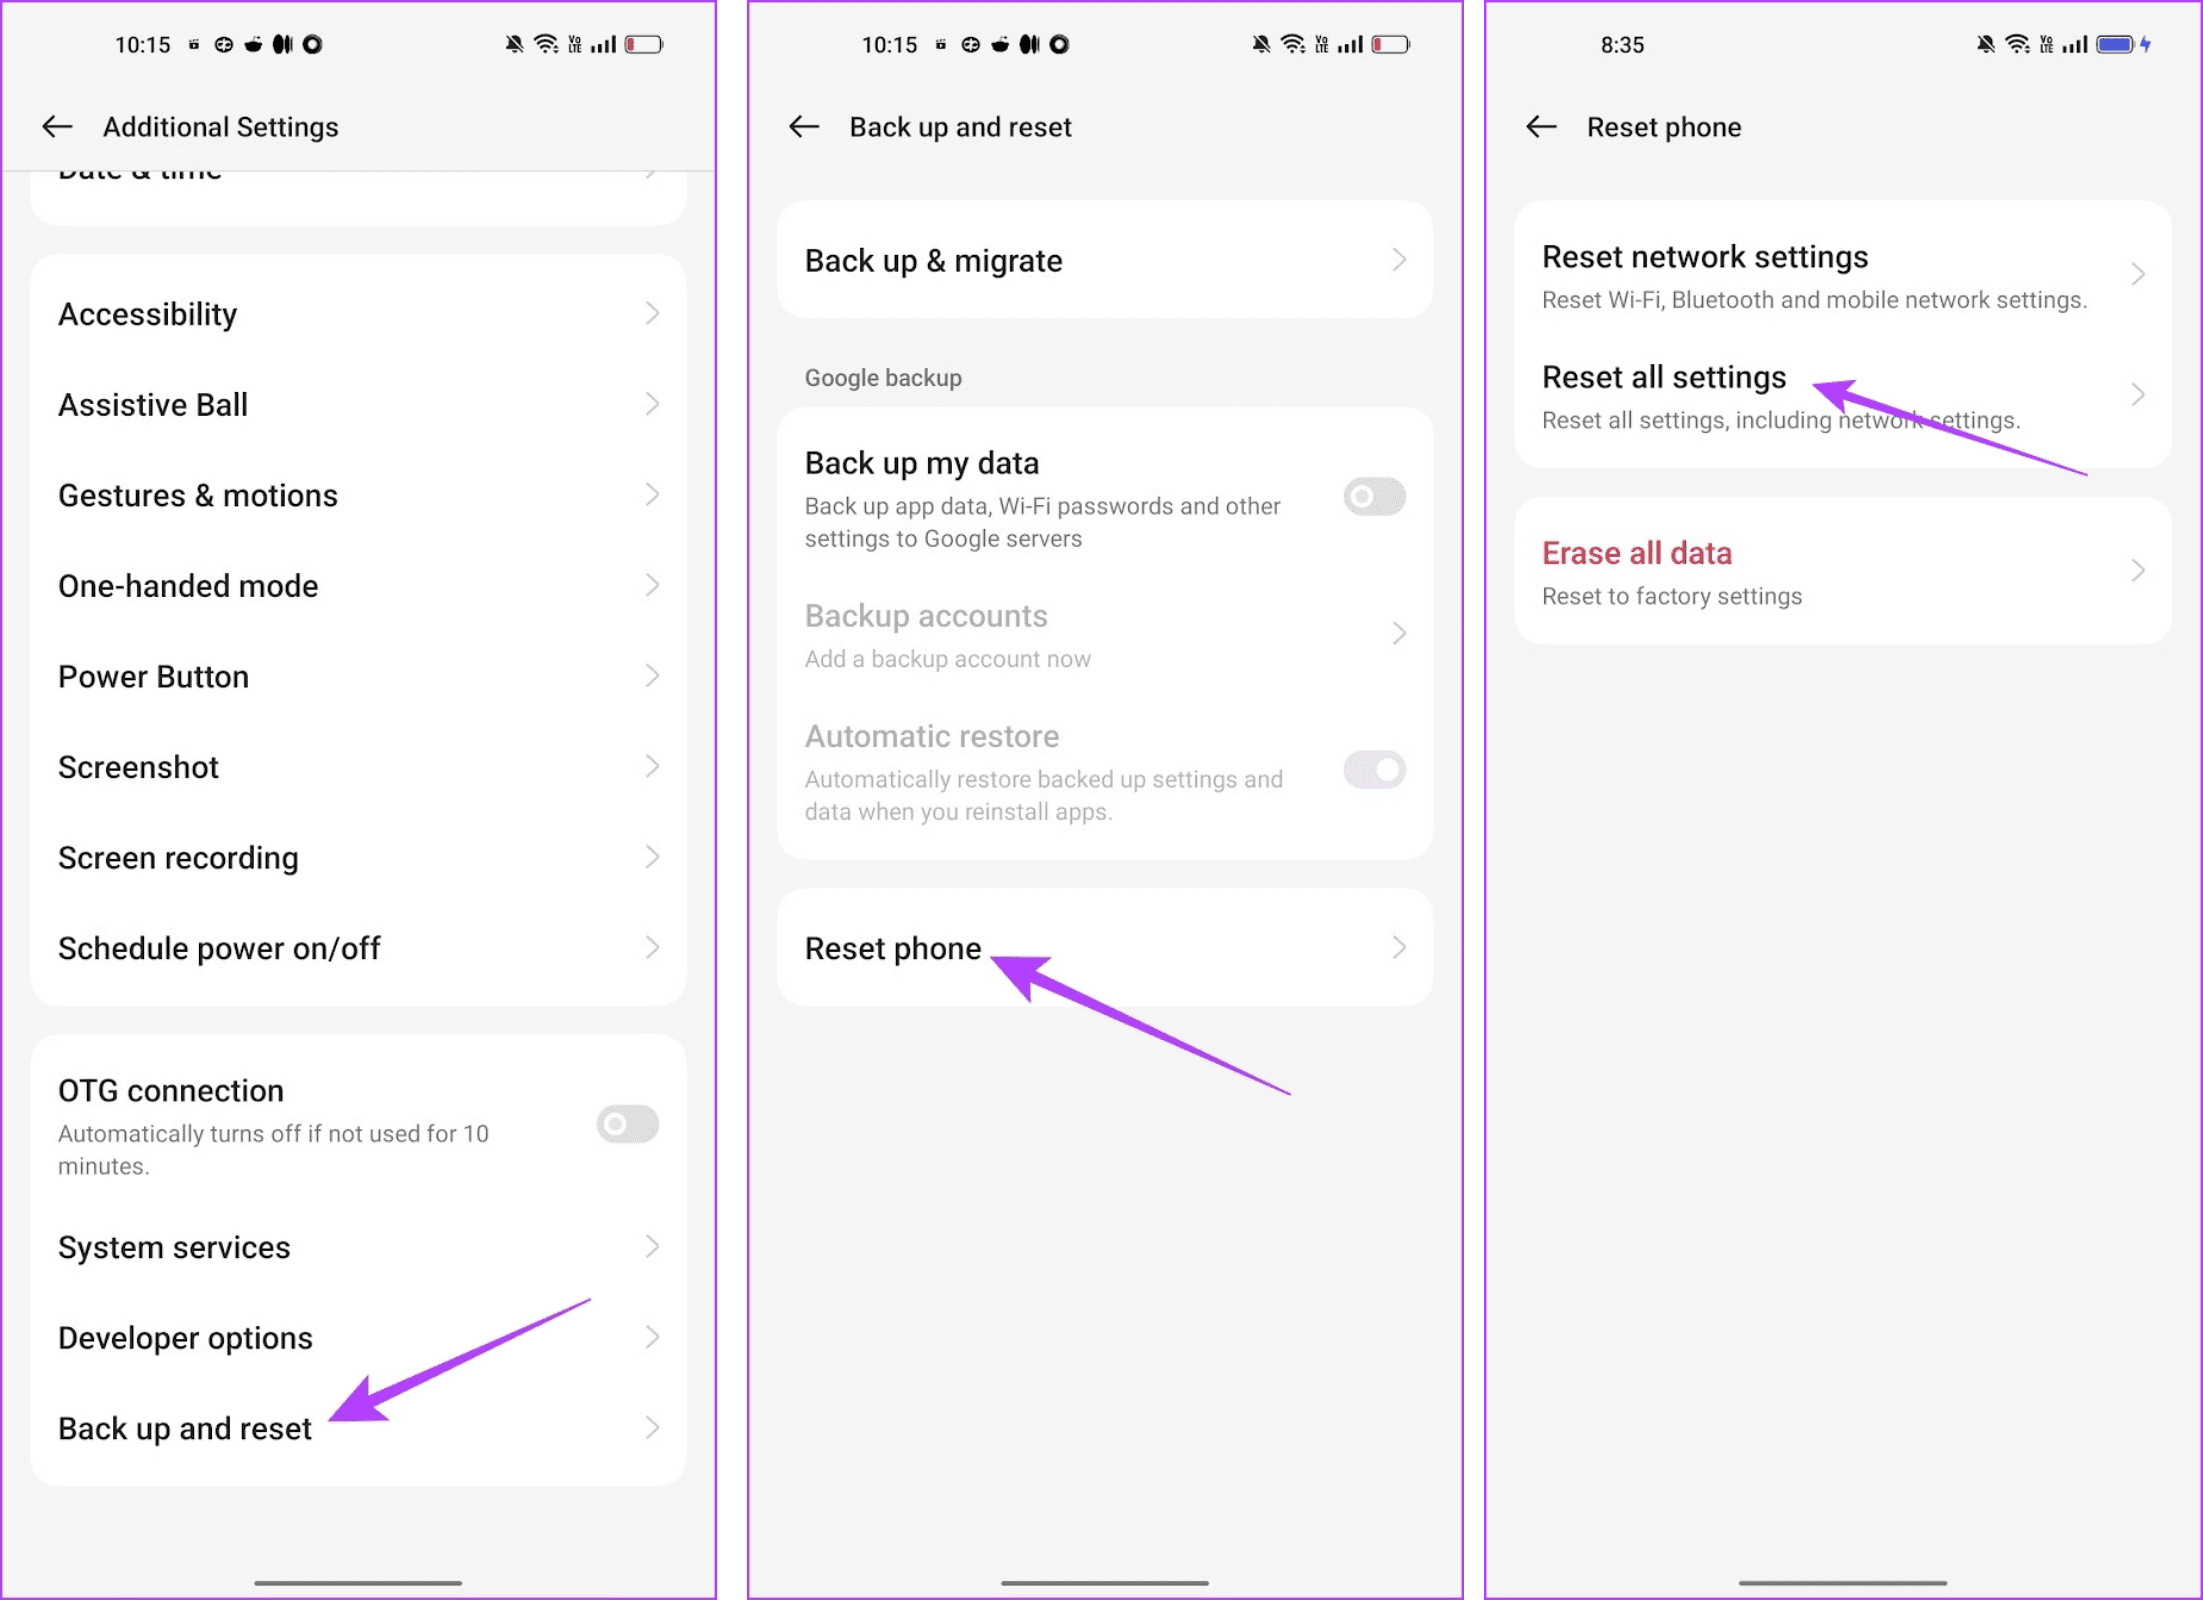
Step 3: Tap on Back up and reset , and go to Reset phone .
Step 4: Select Reset all settings to bring your device to factory default.
Also Read: How to fix blurry camera on Android phones .
Was this helpful?
Submit Cancel
Thanks for your feedback!
Keep reading